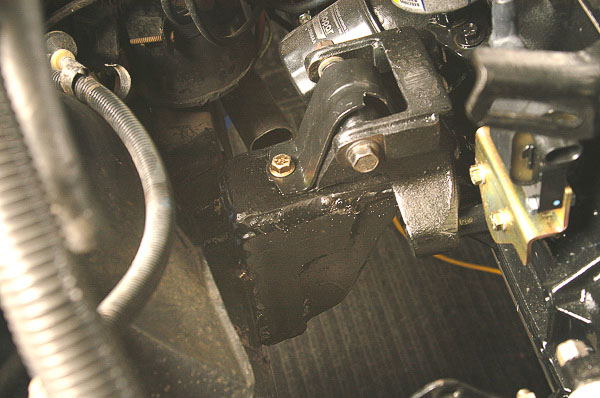
I fabricated these frame mounts to support a Jeep 4.0L engine in a 1987 Jeep YJ Wrangler chassis. The Jeep came with the 2.5L four. 1987-up Jeep Wrangler frames differ between four- and six-cylinder engine applications. (This is unusual from a production standpoint.) I cut off the original frame brackets and fabricated these heavy duty brackets by MIG process. These brackets are MIG-welded to the Jeep frame.
Today, MIG or ‘GMAW’ is the most popular process used in production fabrication and industrial applications. While repairing jet engine turbines requires TIG welding, joining common steel parts can be done rapidly and successfully with MIG welding.

This is the prepped metal after removing the original motor mount brackets from the frame. Note that I leave original welds intact. Assuming that Jeep used the right weld material during fabrication, there is no reason to grind out the welds and undercut the frame rail material. I ran a horizontal bead between the base of the frame rail and a flat remnant of the original factory bracket. In this way, the frame has not been weakened by removing the factory brackets.
Many 4×4 shops and Jeep 4WD enthusiasts have—or will have—a wire-feed MIG machine. MIG welding is fast, “forgiving” in terms of operator skill requirements and reasonably quick to learn. There is a gas shielded, bare wire feed method and also a flux-core wire option. Flux-core works better in outdoor or breezy conditions, where gas shielding is ineffective. The use of a spool gun with flux-core wire is popular for trail welders like the battery operated Ready Welder.
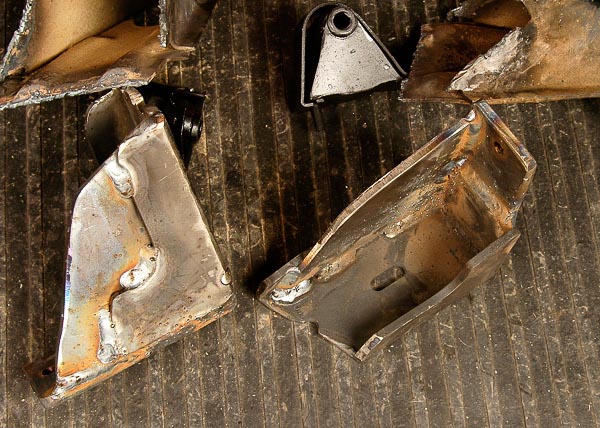
Starting with universal motor mounts from Advance Adapters, I add my own steel reinforcement plates to bolster the stamina of these engine frame mounts. The additional side plating and bracing will assure stronger than factory brackets for the 4.0L inline six engine swap. The remnants of the two factory brackets are at the top of the photo. Note the gauge difference in the metal!
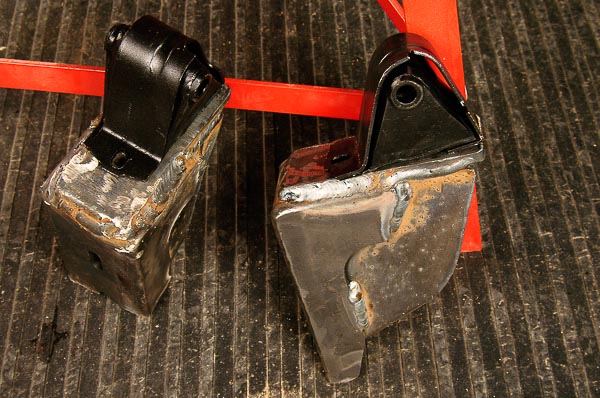
Here you can clearly see my MIG wire feed welds with ER70S-6 wire. Stock 4.0L motor mount cushions will bolt to the top of each bracket. These engine brackets are strong enough for a much higher horsepower engine than the stock Jeep four- or six-cylinder—or even a high output 4.7L stroker six. I tend to overbuild and focus on stamina.

After careful measurements and alignment, I weld this bracket to the frame, using several MIG welding techniques. All welds are “in position”. Therefore, I must do overhead, horizontal and vertical down. For open holes, plug welds add additional strength. (Note: Cushion mounting hardware is temporary and only for alignment at this point.)
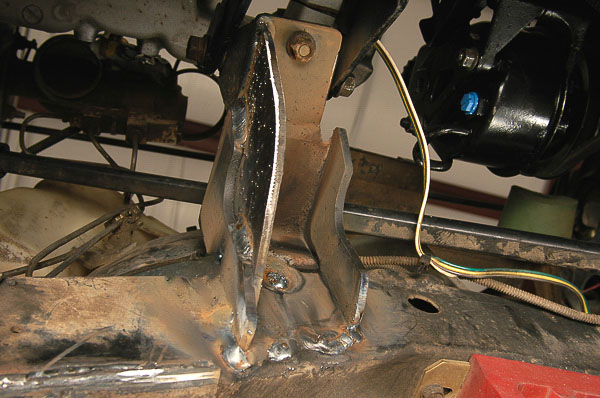
This bracket clears all parts by a wide margin. The steering shaft (above bracket) is actually several inches away. The bracket clears brake pipes, wiring and all moving suspension and steering components. It will serve like the Jeep factory brackets for an inline six—only tougher!
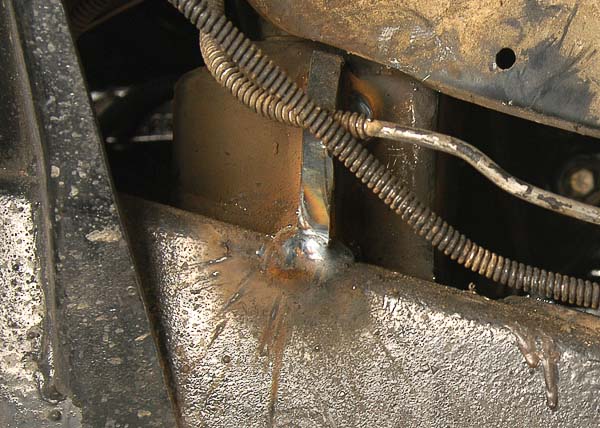
Since the frame bracket extends above the frame rail, I add a thick brace that stands atop the rail. This spreads the load instead of all weight and torque resting on the vertical, inner face of the frame rail. I weld the piece to the top of the frame rail and the back of the new frame bracket as shown. MIG welding is quick and works well in this less than spotless environment! I used gas shielding and bare wire here.
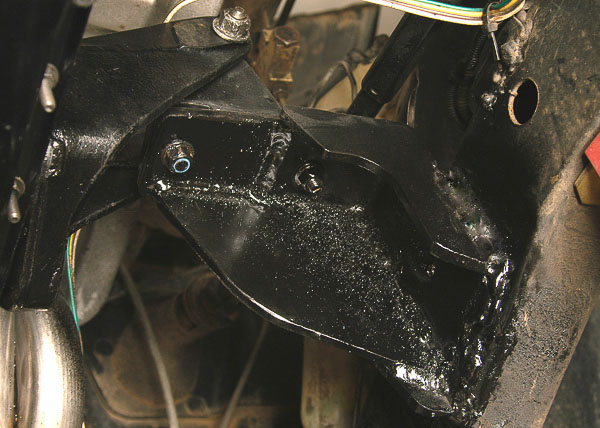
Rugged, functional and on for the life of this Jeep 4WD Wrangler! MIG welding was optimal for this application, as the metal is older. The degree of cleaning does not meet TIG welding requirements, yet weld pentration and strength are excellent. A MIG machine for the smaller 4WD shop or a hands-on Jeep owner is practical!
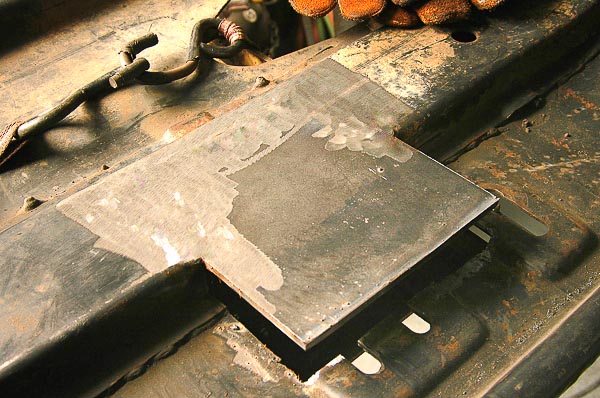
Here, I move to the rear transmission mount at the skid plate. The switch from an AX-5 to AX-15 transmission requires work on the plate. Careful measurement and clean, straight cuts with a plasma cutter set the stage for welding this plate into the cross brace with MIG process. My wire feed runs a 75/25 gas mixture and 0.035″ ER70S-6 wire. This works very well on the new steel plate (shown here) and old metal.
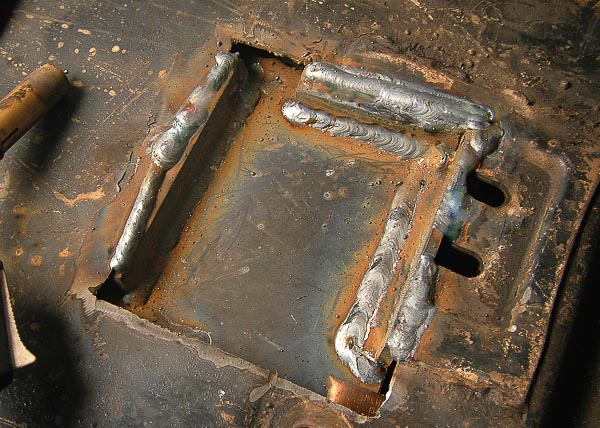
In minutes, I run wire feed MIG beads to secure plates and form a box. Again, this is my typical “overkill” approach. The finished transmission mount pedestal is likely three times the strength of the OEM support! (Note thin factory skidplate material compared to the reinforced box members. Favor the thicker metal during the welding process.) This will reinforce the factory skid plate and provide a rugged support for the engine, an AX-15 transmission and an Atlas II transfer case.
Note: The skid plate metal is impossible to clean thoroughly, and TIG welding is not a possibility with older metal like this. Stick arc welding would be okay with 6011 or, for stronger welds, 7018 electrodes; wire feed MIG is faster and more effective in this situation.
There are many ways to improve your MIG welding skills. If you weld mild steel plate all day, the use of ER70S-2, ER70S-6 or ER80S-series wire would be straightforward. If, however, you plan to weld aluminum with a spool or weld cast iron with your MIG machine, you need to know metallurgy. Getting sufficient penetration, forming a strong bead and joining metals safely with MIG fusion welding are skills acquired with knowledge and experience.

