
Oil and filter changes are a critical part of Jeep maintenance. Whether your Jeep is new or has high mileage, premium oil and regular filter changes protect your investment. Use of genuine Mopar filters will extend your Jeep’s service life and increase reliability.
For many climates, winter and summer are optimal times for oil change. The magazine’s XJ Cherokee spends summers in the Nevada desert and High Sierra heat. November through May, that same region drops temperatures well below freezing for months. This calls for oil viscosity changes.
The June 1st and November 1st oil changes include a switch in viscosity. Sub-freezing late fall through spring, 5W-30 weight oil is the choice. June through October, protection means 10W-40 weight oil. Oil changes are never more than 5,000 miles apart, and each change includes a new Mopar oil filter.

Following these steps, you can perform an oil change with minimal tools. Change oil and filters regularly, following the guidelines in your glovebox Jeep Owners Manual.
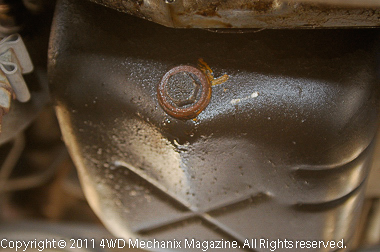
1. Here is the oil drain plug on a 4.0L Jeep inline six-cylinder engine. Other Jeep models are similar. This plug shows mild oil seepage, enough to stain your driveway and film the under-carriage with oil over time.

2. The drain plug seepage blows back to the converter housing. This easy-to-remedy oil leak is often mistaken for a rear main seal leak. There is a simple solution here.

3. Use a large drain pan to avoid splash and spillage onto the shop floor or driveway. This inexpensive cement mixing trough works well and has lasted several years.
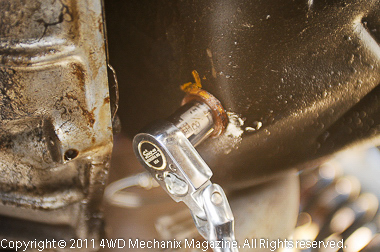
4. Warm oil will drain more completely, taking contaminants with it. Avoid scorching yourself with hot oil! Drain the oil warm and wear nitrile gloves to prevent exposure to hazardous drain oil.
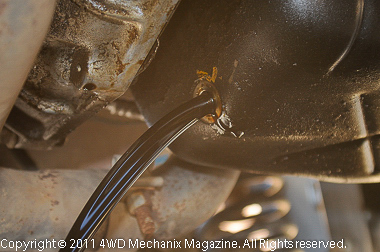
5. Warm 10W-40 weight oil runs out of the crankcase like water! Make sure you pull the drain plug away slowly from the last thread to avoid uncontrolled spillage. Keep the drain pan centered to allow for an arc of oil flow.

6. This handy platform, acquired years ago, easily attaches to the 33″ tire. Adjustable to various light truck tire sizes, the platform is ideal for lifted Jeep 4x4s and trucks with tall fenders and deep engine bays. This makes oil changes, tune-ups and engine work easier.
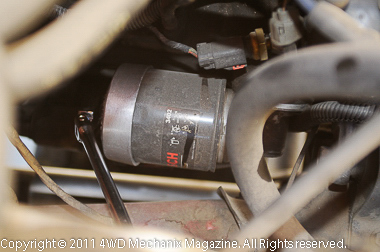
7. Use a filter cap tool and a flex-handled rachet for safe oil filter removal. If you do not over-tighten the filter, it will come loose later with reasonable force. This notched filter wrench fits snugly at the end of the filter canister.
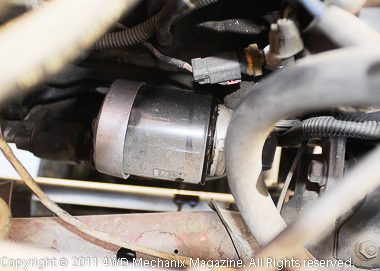
8. Make sure the drain pan is beneath the oil filter. Horizontally mounted filters will pour out oil as soon as the filter loosens. Spin out the filter just a few threads. Let oil drain into the pan before removing the filter.
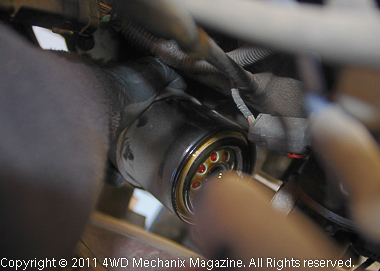
9. Filter drained, you can unthread the filter completely from the engine adapter. On horizontal mounts like this one, point the loosened filter toward the drain pan and let out the remaining oil.
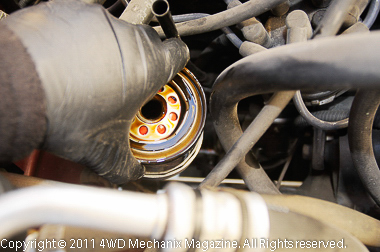
10. Empty old oil filter is now lifted straight up and out of the engine bay. On many models, the filter removal is from the bottom of the engine. For this XJ Cherokee 4.0L inline six, lifting upward is easier. Make certain that the old filter gasket comes off the filter mount. Wipe old oil from the filter mount with a clean, lint-free rag.
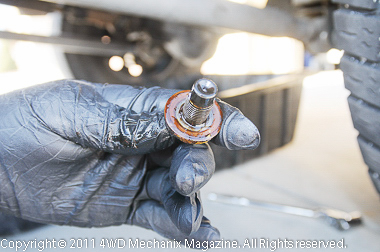
11. This oil drain plug has been leaking slightly, enough to stain the driveway between oil changes. The built-in rubber gasket is flattened badly.
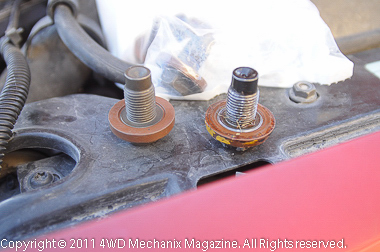
12. Plug at right shows flattened gasket and metal-on-metal contact at the sealing face. This plug cannot seal, no matter how tight the torque on it. A new Mopar plug (at left), available through Jeep dealerships, will remedy a nuisance oil leak.
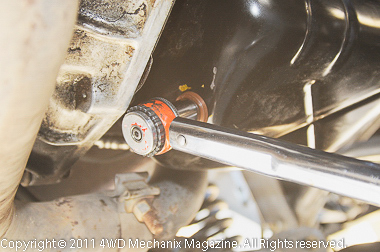
13. New plug must not be over-torqued. Setting for this 4.0L inline six is 25 ft-lbs. Make sure threads are clean before installing the plug. Torque to specification, allow to set for a moment, then check torque again.
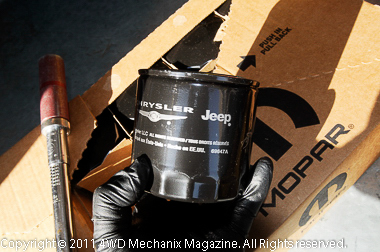
14. Generic oil filters often fit a variety of engine applications, without matching the oil flow specifications for your engine. Genuine Mopar oil filters will have the correct pressure drop across the filter, the right factory by-pass valve relief setting and the proper micron filtration.
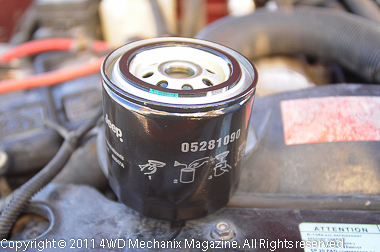
15. The filter’s installation instructions are on the canister. Follow these instructions. Do not allow debris to fall into the open, clean filter. Make sure the new gasket is in place. Be sure the old filter gasket is not stuck to the engine mount.
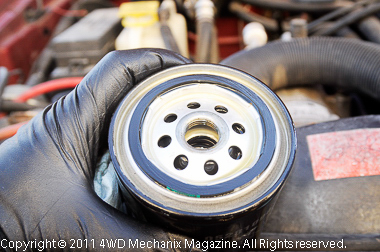
16. Put a film of clean motor oil around the gasket face. If the filter mounts vertically or at least faces upward, fill it with fresh oil. Horizontally mounted filters can be partially filled before installation. A half-fill works on this XJ Cherokee 4.0L inline six application.

17. New Mopar oil filter is carefully threaded onto the engine adapter threads. Keep all surfaces clean. Start the threads carefully. Partially filled with oil, keep the horizontally-mounted 4.0L oil filter upright as long as possible. Prompt installation will help avoid oil spillage from the new filter.

18. If the filter is difficult to reach and tighten, use the filter end cap wrench and a ratchet. Snug up the filter to the amount described on the filter canister or packaging. Do not over-tighten the new filter or damage the canister. Center the tool and tighten the filter evenly.
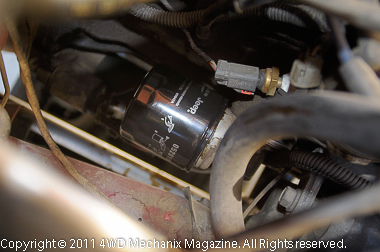
19. If you can grip the filter comfortably, tighten it securely by hand. One strong hand at the end of a smaller filter is adequate for this 4.0L inline six installation.

20. New Mopar oil filter is now secured by hand. The XJ Cherokee is notorious for dirty drain oil pouring over the low-hanging wire looms and suspension parts. Wipe off any drainage spills before running the engine. Check for leaks after start-up.
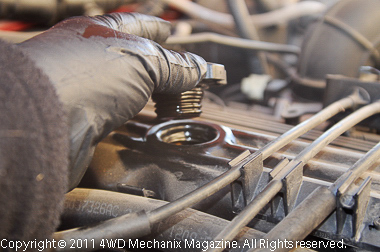
21. Wipe away debris and remove the oil fill cap. Most modern caps are threaded with an O-ring or gasket seal. They have a torque sensitive “rachet” mechanism to avoid risk of over-tightening. Wipe the cap clean.

22. A large capacity oil fill can with spout and lever-stopper can handle a full crankcase of oil. Place the can on a solid and stable base, steady enough to not fall over when weighty oil fills up the can! 4.0L inline six has a crankcase capacity of six quarts (U.S.) with the new oil filter installed.

23. Flex spout on oil can allows filling the engine without risk of spillage. Once oil drains completely into the engine, the spout can be easily bent upward from the valve cover opening, avoiding spillage and drips.

24. Use a high quality motor oil. Mopar offers both oil and filters. Our ’05 Ram-Cummins engine uses Mopar MaxPro® 15W-40 diesel formula motor oil. For the XJ Cherokee 4.0L six (shown), this fill is for winter, using 5W-30 weight Chevron Supreme ‘Iso-Syn’ formulated oil. For summer months, the switch is to 10W-40 weight oil.
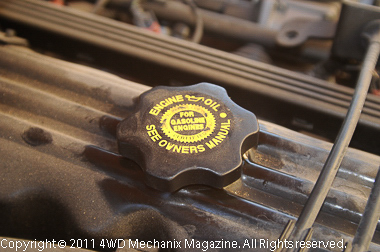
25. Clean and install the cap carefully. This cap rachets when secure, preventing risk of over-tightening. As indicated on the cap, you can find the recommended oil type and viscosity listed in the Owners Manual.

26. Check the engine oil level before start-up. On the 4.0L engine, six U.S. quarts will fill the crankcase and new Mopar oil filter. On the dipstick, the level reads over-full prior to the engine startup. Once the engine starts, the oil filter will fill completely and drop the dipstick reading.

27. Start and run the engine at an idle. With a primed oil filter, oil pressure should come up quickly. Allow the engine oil to circulate completely for a few minutes while checking for oil leaks at the filter and drain plug. Shut off the engine. Allow oil to drain fully into the crankcase (five minutes or so). On flat ground, re-check the oil level on the dipstick and adjust the oil level to the full line if necessary. Do not overfill.
Your oil and filter change is now complete!
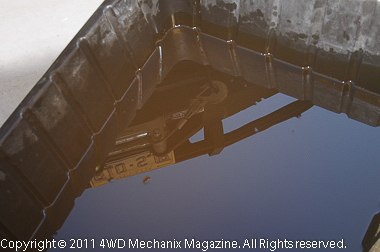
28. A crankcase of dirty motor oil is now in the drain pan. At our shop, this oil goes into a storage tank then gets transferred via five-gallon pails to a disposal station for motor oil. Handle oil with nitrile mechanic’s gloves.
Quick Underhood Spot Checks: Avoid the Perils of Winter!
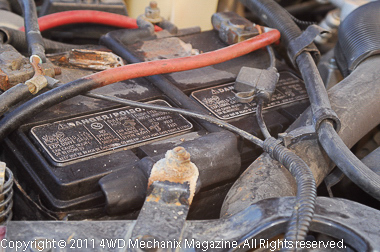
The most critical of winter needs is a good battery. Nothing saps a battery more than a low state-of-charge and cold-weather cranking. A battery that seems fine during the summer often fails completely in severe cold weather! Have your battery load-tested prior to cold weather driving. Be sure the drive belt(s) and coolant hoses are okay!
For us, winter typically means isolated highways, sub-freezing weather, ice and snow buildup on roads—plus extreme wind and poor visibility. When we venture into winter driving, whether on-highway or off-pavement, our Jeep 4WD is ready.
In the modern era of self-service fueling stations, it is up to owners to spot check the underhood fluid levels between routine service intervals. Whether you sublet your routine service or not, underhood spot checks can ward off trouble…and winter is certainly no time for trouble!
While underhood with your oil and filter change, make a quick spot check. This is not a substitute for the full-service talked about in the “Jeep 4WD Lube-Oil-and-Filter Service” or “Routine Service for Late Jeep 4WD Models” articles. (See these two articles for details.) Here, we’re addressing just the obvious underhood spot checks and trouble areas…

Windshield washer performance can be vital to visibility on a slushy, iced highway or muddy gravel road. Make sure the wiper fluid has adequate anti-freeze protection—to at least minus-20 degrees F.
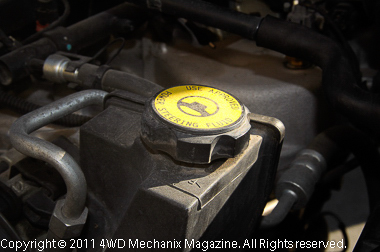
Power steering is a safety item. The power pump reservoir is accessible with an easy to read dipstick. Keep this area clean and do not introduce dirt or lint into the reservoir. Use Mopar power steering fluid only.
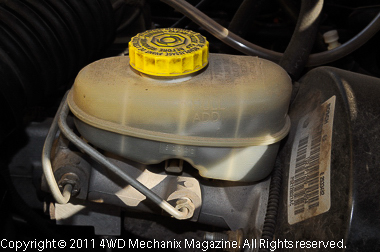
Brakes are always essential! Fortunately, you can see the fluid level within modern clear plastic reservoirs without removing the cap. Make sure the vehicle is on level ground. This cylinder is tilted, giving the impression of low fluid. Check when level and do not overfill. Use recommended Mopar brake fluid.

The automatic transmission dipstick and fill tube are accessible under the hood. The stick indicates proper fluid level and describes which position the shifter should be set before checking fluid. Temperature is also a factor. Use only the Mopar ATF recommended for your specific model and year of automatic transmission.
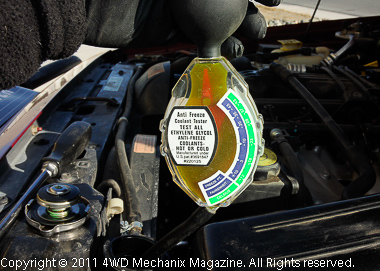
Anti-freeze/coolant is also critical in the winter. Keep to at least -34 degrees F protection year round. This is a 50/50 mixture with traditional anti-freeze (not pre-mixed). Always check anti-freeze with the engine cold, at the radiator filler cap. True radiator protection is read at the radiator.

The coolant recovery tank should also be good for -34 degrees F protection (same as the radiator). A common mistake is to add coolant or water to the recovery tank without maintaining the -34 degrees F protection. Coolant, over time, mixes thoroughly between the tank and radiator. If uncertain whether fluid has mixed thoroughly, check both the radiator and recovery tank with your anti-freeze hydrometer.
