
AAM’s 9.25″, 10.5″ and 11.5″ axle design has several quick-service features. The crush sleeve for pinion preload adjustment and the threaded adjusting rings for setting carrier bearing preload are two time savers.
The preload adjuster rings have external slots for rotating the ring. To rotate these adjusters, Miller-SPX has produced a special spanner for the task. (See below.)
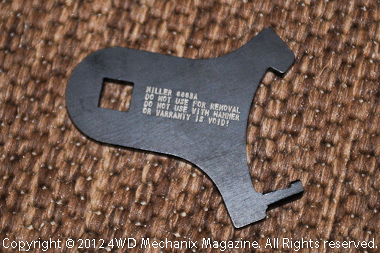
The Miller-SPX #8883A Tool is available at the SPX website. If your shop does this work regularly or you prefer using the factory recommended tools for your axle work, consider investing in this tool.
For those doing this job one time or not being able to afford the 8883A tool, you can fabricate a similar tool with basic welding equipment and a grinder. We do use the Miller-SPX 8883A tool, but in the interest of viewers who need to make their own spanner, we built a functional tool for this project.
Here is the procedure:
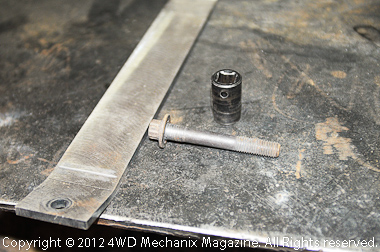
Step 1: The materials include flat steel strap 1/4″ thick (at left), an old and expendable impact socket and a high-tensile used steering knuckle bolt.
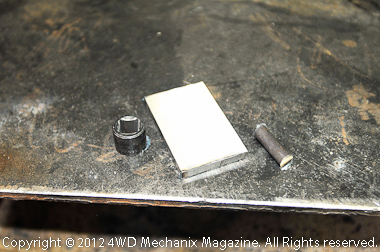
Step 2: Pieces are now cut to rough size. Plate is the body of the tool. 1/2-square insert will accept a rachet. Bolt shank can be made into the small hook arm.
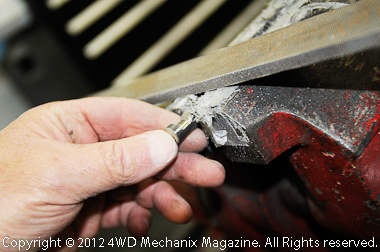
Step 3: Grinder and file create a notch in high-tensile steel bolt shank. The grinder makes quicker work of this task.
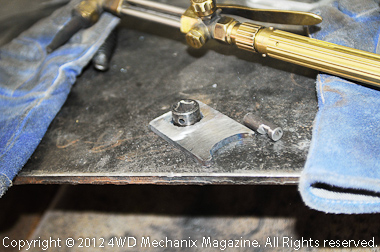
Step 4: Torch quickly cuts hole for modified socket section. Note the rough shaping of the arc for leveraging the pull, similar to the goal with the factory tool.
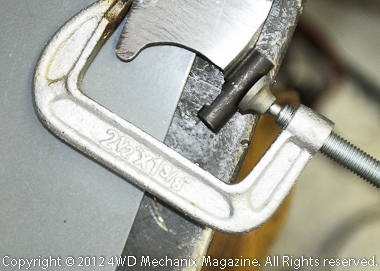
Step 5: The arc is not contoured for the adjuster ring surface. It leads to a leverage pivot point. This tool actually fits the 9.25″, 10.5″ and 11.5″ AAM axle adjuster rings, regardless of ring diameter. Bevel at the plate edge will allow welds to burn into each other for maximum strength.
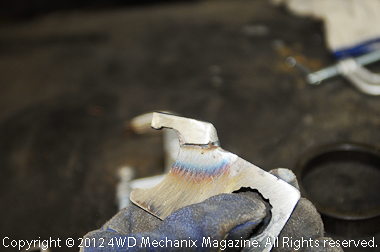
Step 6: The plate is now welded to the shank. Weld from opposite side overlaps and creates one solid piece of metal at the weld section. Filler material is 70,000 psi tensile. Grinding has flattened the hook to fit slots.
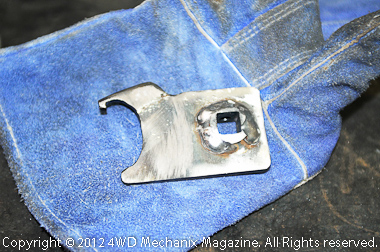
Step 7: Further shaping and the socket gets welded to the plate. Socket has been cut to provide rachet hook-up from either side, a simple 1/2″-square drive receiver. Welding and surface grinding have eliminated any trace of the original bolt and plate as separate pieces. Metal fusion was complete.
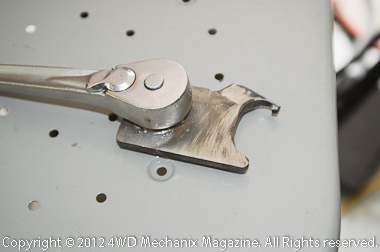
Step 8: Here, the ratchet fits readily into the tool receiver. This tool is ready for a trial fit.
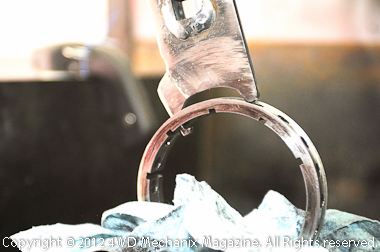
Step 9: The new “tool” fits the adjuster ring, its hook grabbing the slot hole much like the factory tool.
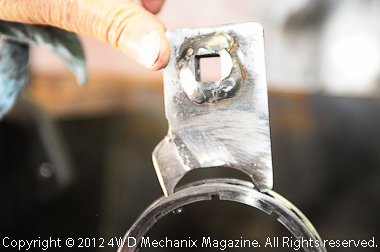
Step 10: Force angle wants to rotate the ring. Hook angle is critical to get this effect. Hook ledge catches the inside edge of the ring (as shown) and turns the ring. The tool was tested on the 11.5″ ring-and-pinion gear set installation.
This tool is for made for one-time use and not intended to replace or outperform the Miller-SPX 8883A spanner. The hook is the weak point due to the narrow width required in this tool application.
To fit the slot, the hook must be small and narrow. Miller-SPX notes, “Do not use for removal”, indicating the factory 8883A tool will not handle excessive force in the case of a binding or stubborn adjuster ring…Even bearing preload, after years of hard axle service, can create resistance beyond the range of the Miller-SPX 8883A or this homemade tool.
