This instructional HD video is for any installer—from the professional technician to the home shop project, or even an instructor needing classroom curriculum or project material. The aim is a successful installation of ring-and-pinion gears, with all the necessary steps for accessing, removing and installing the differential, pinion shaft, all bearings and the ring-and-pinion gear set assemblies. Discover which tools are essential and alternatives like trial fit “dummy bearings” that save both time and considerable cost…For the video production, the prototype vehicle is a 2005 Dodge Ram 3500 truck undergoing a gear ratio change. Primary work steps apply to Dodge, Ram and GM trucks equipped with AAM 9.25″ and 11.5″ axles. The general steps are also common for the 10.5″ and similar AAM axles.
American Axle & Manufacturing (“AAM”) builds OEM axles for Chevrolet/GMC and Dodge/Ram trucks. The magazine’s 2005 Ram 3500 4WD came with an AAM 11.5″ rear axle and an AAM 9.25″ front axle. The 75-minute HD video provides a detailed step-by-step guide for disassembly, assembly, bearing preload adjustment, shimming the pinion gear and setting ring-and-pinion gear set backlash. Use a factory service/shop manual (“FSM”) for specifics on your particular year and model axles.
Note: Differentials and brake assemblies may vary between makes and models. However, the overall axle and differential service procedures remain the same—and this even includes the 10.5″ AAM axle design. When performing work on your specific truck, use a factory shop manual as your reference guide.
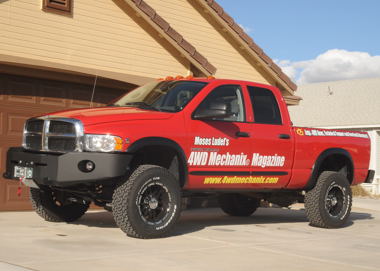
The bump to 35″ diameter tires left our Dodge Ram 3500’s original 3.73:1 axle gears lacking. Too tall gearing for the new BFG tires, plus an added 1,100 pounds of utility accessories during the Ram’s “makeover”, the truck needed remedy. Boosting engine power was a possible solution at the expense of fuel efficiency. A change to 4.56:1 ring-and-pinion sets made better sense for our planned trailer pulling.
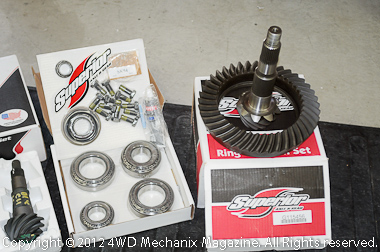
AAM axle gear sets are available from several sources, including American Axle & Manufacturing. In 2012, we turned to Superior Axle & Gear for a quality “kit” approach. Their package consisted of two ring-and-pinion matching sets (11.5″ for the rear, 9.25″ for the front) plus Timken bearing sets, new ring gear bolts, preload shims, crush sleeves, seals, sealants, thread locker, tooth contact paint, and a pinion nut for each set—complete!
Note: If you cannot access Superior Axle & Gear products, consider using genuine AAM parts, they are the manufacturer of OEM axles and replacement components. Randy’s, Yukon, Revolution Gear and others are additional sources for aftermarket gears.
For those familiar with Dana integral axles, the AAM approach is a departure, especially the differential carrier removal and installation. In some ways, the AAM is quicker to set up than the Dana units. However, like every axle type, the critical, adjustments remain the same: 1) pinion depth into the housing, 2) pinion bearing preload, 3) differential/ring gear backlash and 4) carrier bearing preload.
The right tools are an important part of an axle build. The AAM units require some specialty tools like the Miller 8883A spanner or equivalent. Determine whether rebuilding your own axles matches your skill level and tool budget. Whether this is a one-time task or your professional work, the steps described in the HD video instructional step-by-step available at this post and also the YouTube Road Ready Channel will serve as a guide for these critical tasks. The instructional level is also well suited for adult education Automotive Technology classroom curriculum and training.
Skill level required: Familiarity with gear mechanisms and ability to follow technical steps.
Needed tooling: Specialty tools required—consider the cost before taking on this kind of project. The video describes a number of alternatives to expensive tooling and equipment.
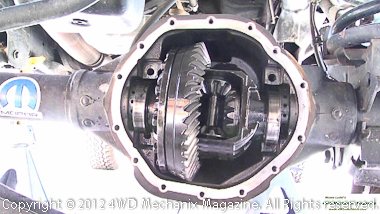

View the HD video at full-screen 1080P* mode for detail! Learn quick, safe methods for disassembling the front axle and removing the differential carrier. The video has been produced in 1080P high definition and will stream at that resolution if bandwidth is available. This how-to video can stream to all platforms—from smart phones to big screen televisions.
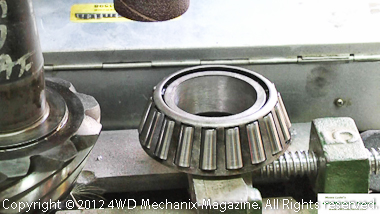
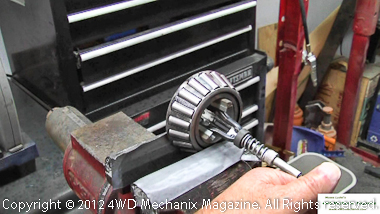
Improvising on tools can save cost and provide a high degree of accuracy during the setup of the ring-and-pinion gears and bearing preloads. Find out how the original bearings, if in good condition, can become useful “tools”.

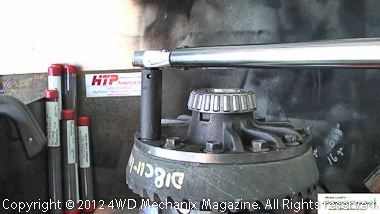
Removing and installing a ring gear takes care and orderly steps. At right, the new ring gear pulls readily onto the clean differential carrier after heat soaking the ring gear in the parts washing cabinet. The cabinet solution, pumped at 140-150 degrees F, heats the gear substantially in just ten minutes of wash time.
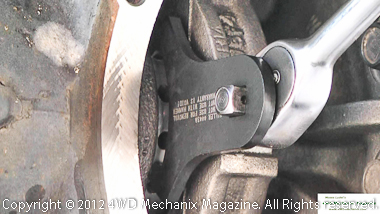
The Miller/SPX 8883A special spanner (above) is for rotating the adjuster rings on a 9.25″ or 11.5″ AAM differential carrier during fit-up. Carrier bearing preload is generally 4-6 notches tighter than zero play. Carrier bearing preload is confirmed as gear rotational resistance, measured with a torque wrench on the pinion flange nut. The video shares an improvised tool that can perform the same function as the Miller/SPX 8883A.


Tooth contact patterns can indicate pinion gear depth in the housing, ring-and-pinion backlash, ring gear runout and gear alignment. For quick backlash checks, the dial indicator (at right) with magnetic stand is the professional tool of choice. Backlash on the 9.25″ AAM axle is 0.005″-0.007″. These ring-and-pinion gears have been set to 0.005″-0.0055″—after run-in, backlash should be 0.006″. The axle will run quietly, without backlash noise, yet not run hot nor suffer from excessive friction.
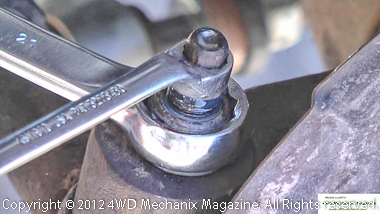
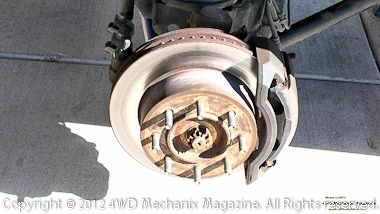
One method for tie-rod end (left) tightening, according to the 2005 Dodge Ram 2500/3500 factory shop manual, is described in the video: Loctite 242 on the threads, torque the nut to 40 ft-lbs then tighten the nut another 90-degrees. The flange base, Nylock nut feels very secure at this torque setting…If you detach the caliper adapters to remove the rotors, the two anchor bolts at each side require clean threads, Loctite 242 and a torque of 250 ft-lbs for HD truck models and 130 ft-lbs for LD truck models. This means time for the use of accurate air impact tools when working on the HD models!
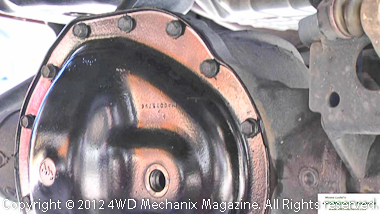
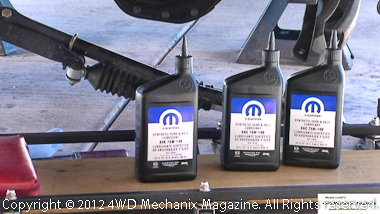
The axle differential cover has been scoured thoroughly, then painted on the outside with a durable, corrosion resistant ceramic engine paint. Bolts are clean with Loctite 242 on threads, torqued to 30 ft-lbs. At right, 75W-140 synthetic Mopar axle lube is our gear lubricant of choice. 75W-90 Mopar synthetic lube would also be acceptable for most driving conditions. The 140-wt.* factor is our choice for summer trailer pulling chores.
*Note: 75W-140 does not mean the oil “thickens” to a 140 weight cold pour thickness when hot. It simply has the same viscosity or ability to lubricate as a 140 wt. at that higher heat. 75W-140 provides a wide range of protection yet pours like a 75W when cold to assure adequate lube and flow in temperatures that require a 75W oil. G.M. and Dodge-Ram do recommend 75W-90 for this gear assembly, so if you are more comfortable with that oil, make sure it is synthetic with high temperature tolerance. At severely high temperatures, 75W-90 offers less viscosity protection than 75W-140.


