How-to: Replacing Unit Bearing Front Hubs on a Jeep XJ Cherokee
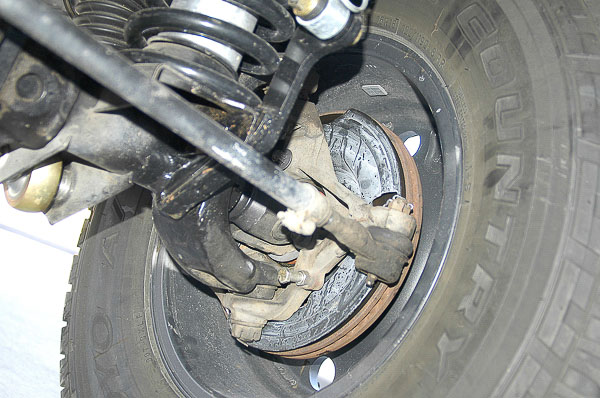
Front wheel bearing grease re-packs were once routine for Jeep 4WD trucks and utility vehicles. Beginning with the 1984 XJ Cherokee, unit bearing front wheel hubs replaced the older spindles with full-floating wheel hubs. Periodic service of front wheel bearings became obsolete. The 1991 Grand Wagoneer was the last Jeep model to feature serviceable front wheel bearings. 1987-up Wranglers and ’92-up Grand Cherokees feature unit bearing front hubs.
Early-on, Mopar offered parts for the unit bearing hubs. (Years back, I sourced Mopar replacement seals for a YJ Wrangler project.) Today, the standard service practice is to replace the entire unit hub/bearing assembly. These new assemblies comes fully greased, ready for installation.
If you run large tires on your XJ Cherokee or the vehicle has higher mileage, the front wheel hubs are likely due for replacement. With the wheels supported safely off the ground, you can check wheel bearings by rocking the wheel/tire. Grip the tire in the six/twelve o’clock position and lift up and lower the tire while checking for play at the wheel hubs.
The wheel hub replacement service is not difficult. Follow the Jeep-recommended service routine. As always, I advise using a Mopar service manual to perform this work. Access the Mopar TechAuthority II Website for factory manuals and technical information:
For 4×4 shops and XJ Cherokee owners, I demonstrate this service work on a ’99 XJ Cherokee. The Jeep 4WD has a six-inch long arm lift kit with oversized wheels and tires. Big tires mean bigger loads. It’s time to change out the unit bearing hubs!
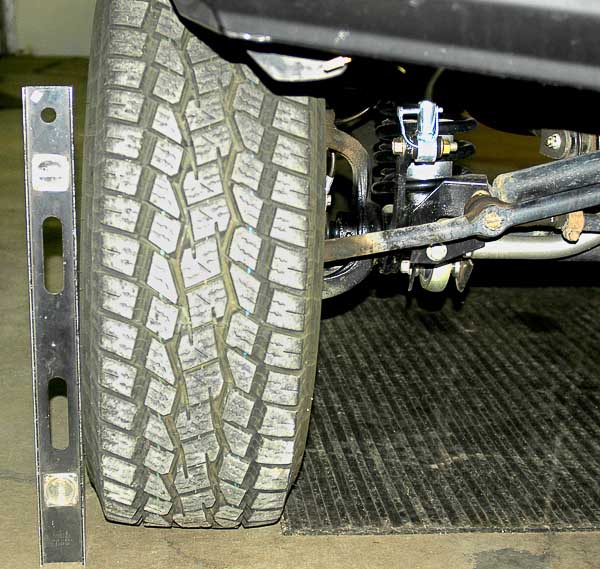
Illus. 1: This front wheel is setting “negative” camber in this view. The cause can be loose ball joints at the steering knuckle, worn front unit hub bearings or a bent axle beam. Each of these prospects is a safety issue, requiring remedy and repair.
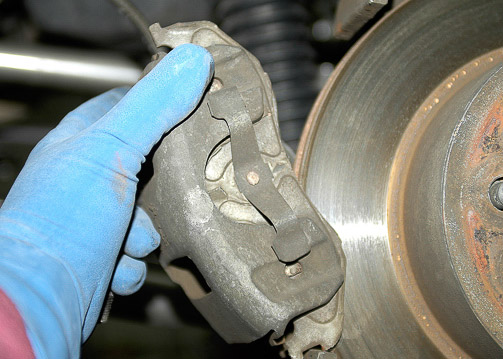
Illus. 2: First step in removing the wheel hub is the caliper removal. Remove the wheel/tire and follow the caliper removal instructions found in the Jeep XJ Cherokee Service Manual for your model year.
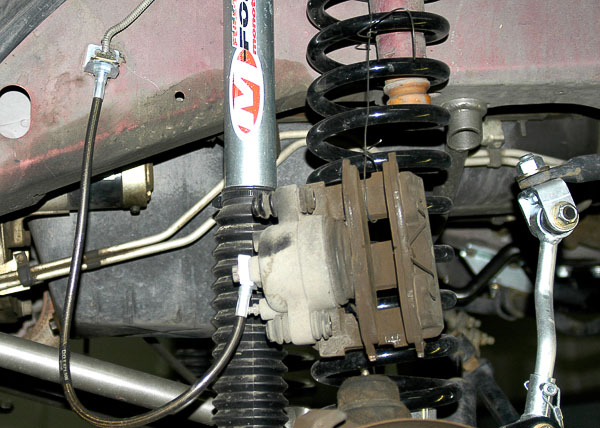
Illus. 3: Tie the brake caliper and hose safely out of the way. I use mechanic’s wire for this chore. On earlier model XJs or a vehicle that has been through prior brake service,
I always replace brake pads and shoes with non-asbestos type lining.
Warning: Some OEM brake lining contains asbestos as late as the 1990s. Despite elimination of asbesto-containing lining at the OEM level, some aftermarket lining contains asbestos to this day. Read labels. Get non-asbestos lining whenever available.

Illus. 4: Remove the axle shaft nut. An air impact gun will make this chore much easier. If you do not have an air impact, loosen the nut before removing the wheel and tire. Use the vehicle’s weight to keep the tire from rotating. Torque is very high and rust is likely!
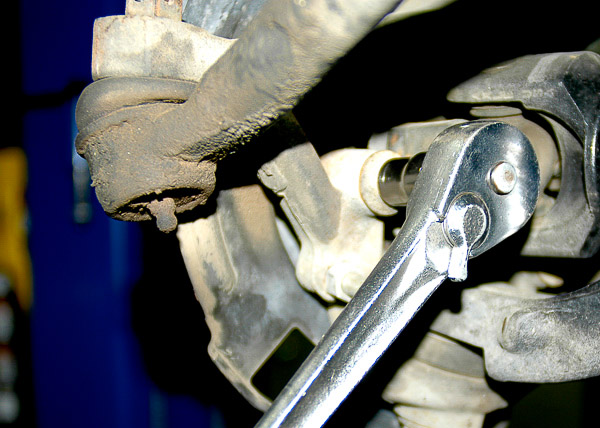
Illus. 5: Loosen the hub flange bolts at the steering knuckles. These can be tight from torque and rust. Often, an impact wrench can free a frozen bolt without breaking it. In this tight location, impact tools may be difficult to operate. An impact ratchet might be an option.
Safety advice: If you suspect that brake pads contain asbestos, avoid blowing dust around your shop with an air impact tool. Consider using hand tools to loosen fasteners.
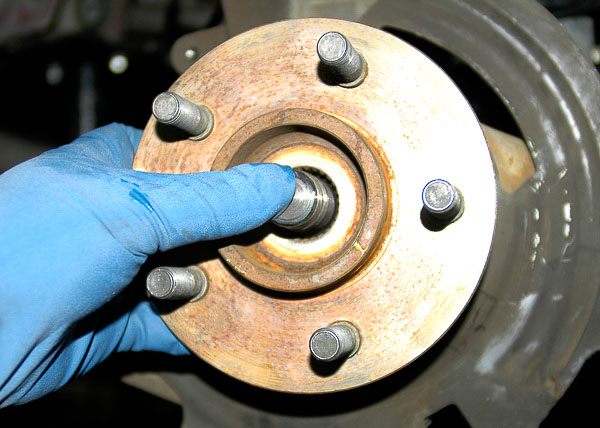
Illus. 6: These splines are not tapered, which “should” allow the axle shaft to push through the hub. Rust can make removal difficult. With the hub unbolted from the steering knuckle, you may need a two- or three-jaw puller to press the shaft through the hub. Do not beat on the axle shaft’s end!
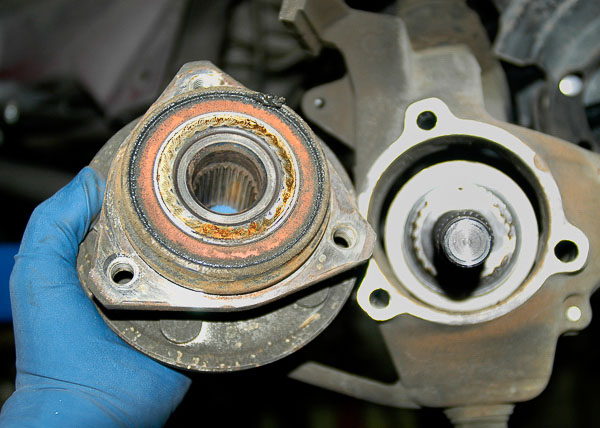
Illus. 7: This is the unit hub assembly. Note the old grease seeping from the bearing. Today, the common approach is to replace this entire assembly rather than service it. Seals, available early-on for bench rebuilding, have been discontinued by Mopar. The amount of labor necessary to rebuild a unit hub makes complete replacement practical. Three bolts hold the flange to the steering knuckle.
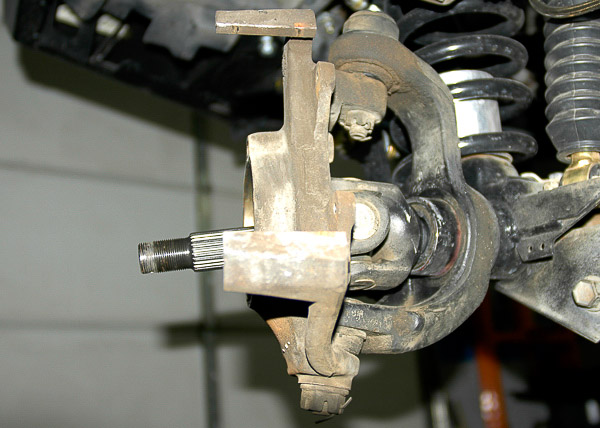
Illus. 8: The axle shaft stays in place during hub removal. Do not remove the shaft; the inner axle shaft seal is vulnerable to damage. If you leave the shaft in position, nothing gets disturbed. If necessary, a jawed puller can remove the hub from the axle shaft without moving the axle shaft in or out.
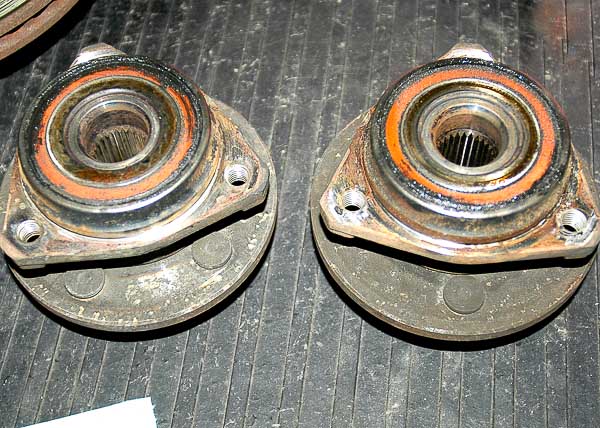
Illus. 9: Left and right side unit hubs are interchangeable. This makes parts less costly and more readily available. I prefer Mopar replacement parts for assurance of OEM quality and proper fit. See your local Jeep dealership for genuine Mopar service parts.
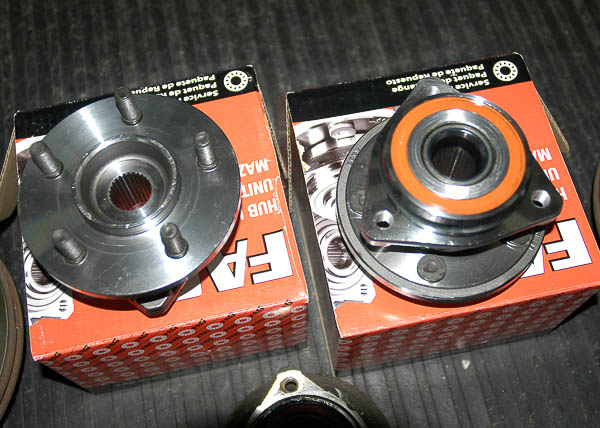
Illus. 10: Unit bearing sets are readily available from Mopar (your Jeep dealership) and the aftermarket. These quality FAG hubs from 4WD Hardware have new wheel studs in place and are ready for installation.
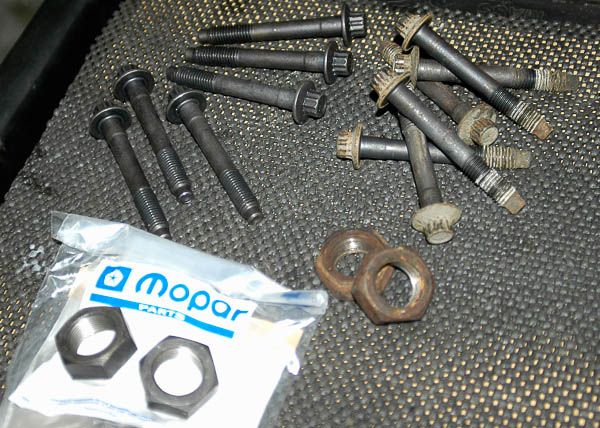
Illus. 11: I replace the unit hub fasteners and axle shaft nuts with new, OEM genuine Mopar pieces. These seriously stressed components demand a margin of safety. I turn to Mopar for that assurance.
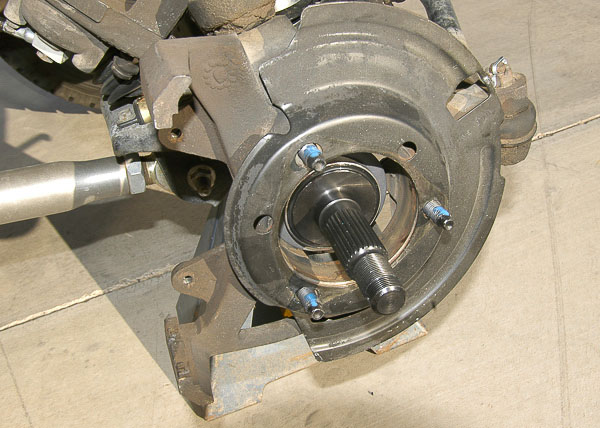
Illus. 12: Clean all parts. Fit-up of the unit bearing hub assembly must be square with the steering knuckle. Here, I apply Loctite 242 to the new OEM Mopar hub bolts. The axle shaft, dust shield and the knuckle flange bores are thoroughly clean to assure a close fit.

Illus. 13: Tighten the hub attachment bolts to the proper torque specification. For this 1999 XJ Cherokee, that spec is 75 ft-lbs. I tighten bolts evenly, in steps and sequence. After reaching final torque, leave the hardware set for a few minutes then re-check final torque.
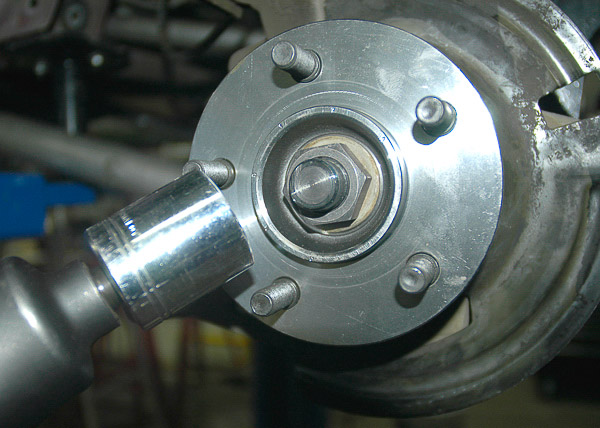
Illus. 14: The axle shaft nut can be snugged up with an air impact tool and socket. (For setting higher torque with air impact tools, always use impact-rated sockets.) Here, the nut gets tightened just enough to seat and stabilize the axle shaft.
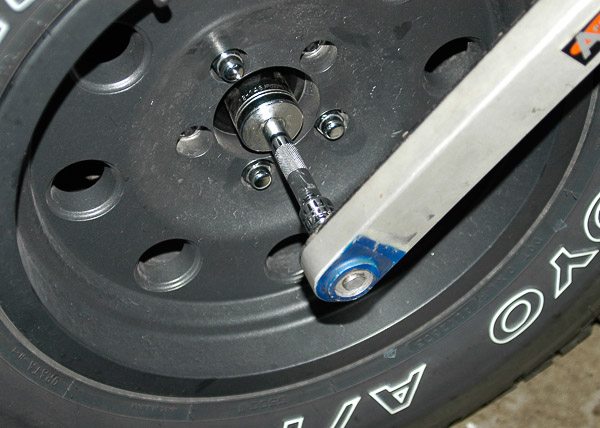
Illus. 15: Final torque is 175 ft-lbs. This requires a hefty torque wrench, like my 0-250 ft-lb dial type. Tires on the ground, I set the Jeep in gear, parking brake set, before torquing the axle shaft nuts. I use Loctite 242 on the axle shaft nuts as a moisture barrier. If the nut requires removal, rust will not be an issue.
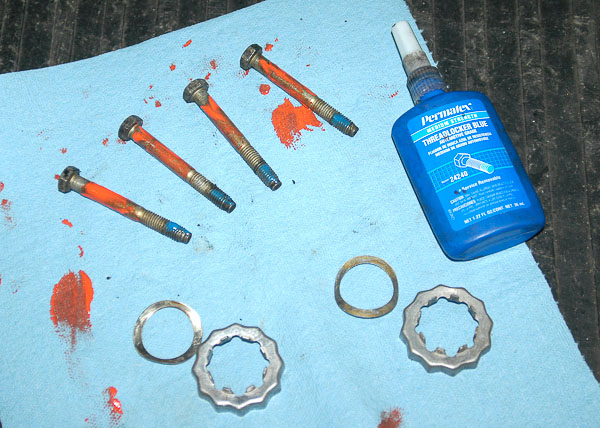
Illus. 16: These caliper mounting bolts get a close inspection. I use anti-squeal silicone compound (orange) on the bolt shanks plus Permatex Loctite 242 (blue medium strength) on clean threads. Inspect hardware carefully, these are safety items. Factory bolt torque for this 1999 XJ Cherokee is a light 11 ft-lbs. I secure to 12 ft-lbs and re-check these bolts after several minutes.
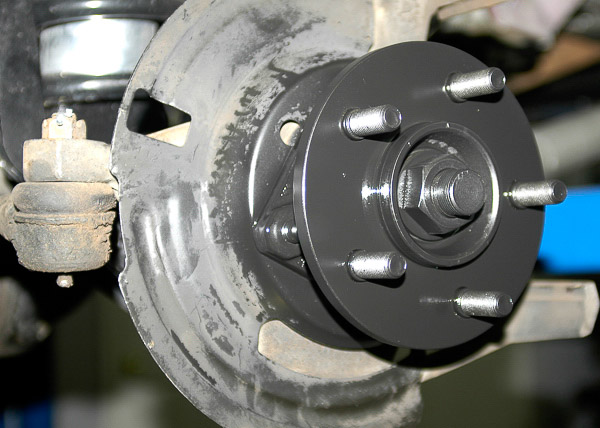
Illus. 17: A light coat of protective, heat resistant paint will help prevent rusting. When using paint in this manner, apply a thin, even coat and do not layer. After torquing wheel nuts in place, drive the vehicle briefly and re-torque nuts to compensate for paint settling.
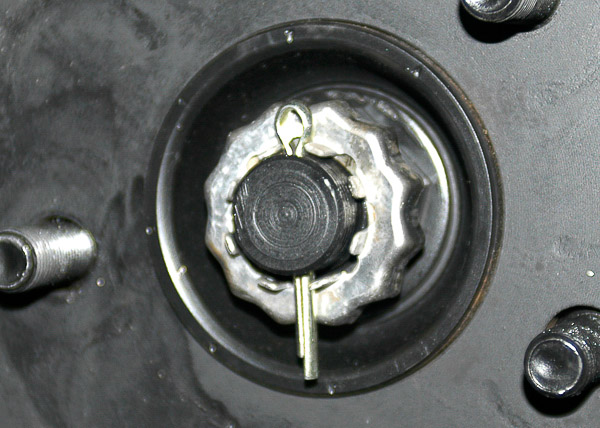
Illus. 18: With the axle shaft nut torqued to specification, install the castellated cap and a fresh cotter pin. Align the cap with the slots and use a cotter pin size that fits snugly through the drilled hole. Use quality parts like this new Mopar shaft nut and castellated cap.
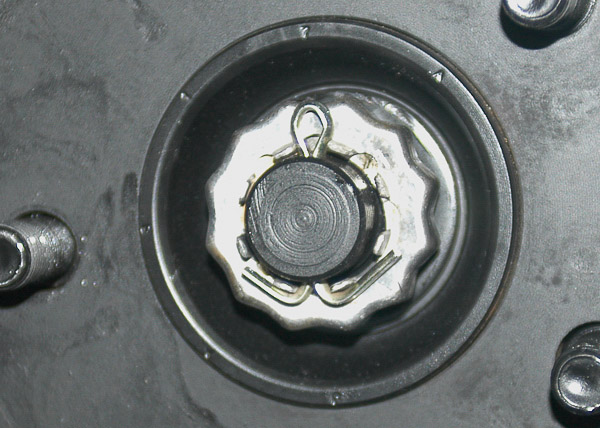
Illus. 19: This is the correct way to install this cotter pin. Note the even flaring of the pin halves. I use Channel Lock pliers and grip the head of the cotter pin while squeezing each pin half. This tightens the pin as the halves spread.
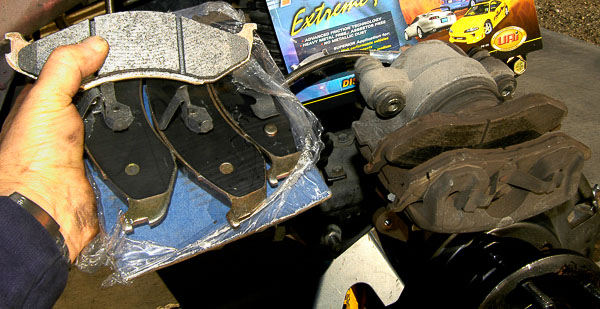
Illus. 20: Here, I install high performance aftermarket brake pads for this lifted XJ Cherokee with oversized tires, ARB Air Lockers front and rear and severe trail intentions! For all-around, general purpose use, genuine Mopar brake pads would be my first choice. I always use non-asbestos pads and brake shoes.

Illus. 21: To install new brake pads, first retract the piston in the caliper. The piston must seat to allow room for thick new pads. Here, a C-clamp readily pushes the piston into its bore.
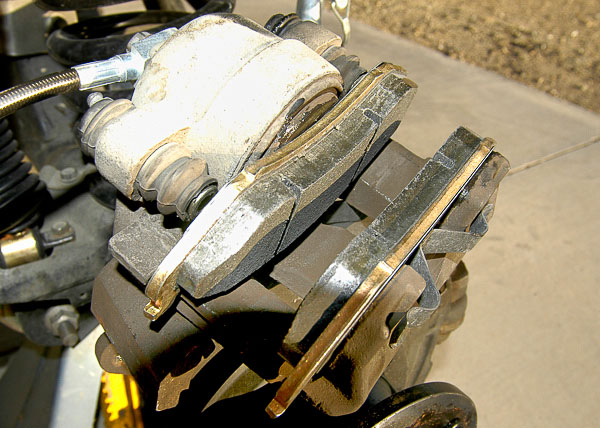
Illus. 22: Here, new pads seat properly into the caliper. (For further caliper details, see the Jeep XJ Cherokee Service Manual.) If you need Jeep factory service data for this kind of work, purchase manuals or a subscription at the Mopar TechAuthority II Website. Click here for direct access to the Mopar TechAuthority II Website!
Note: My Jeep® Owner’s Bible™ (Bentley Publishers, Cambridge, MA) and other books are a thorough orientation to Jeep mechanical processes and technical work. When I need service data, like torque specifications or tolerances, my reference choice is a Mopar service manual!—Moses Ludel
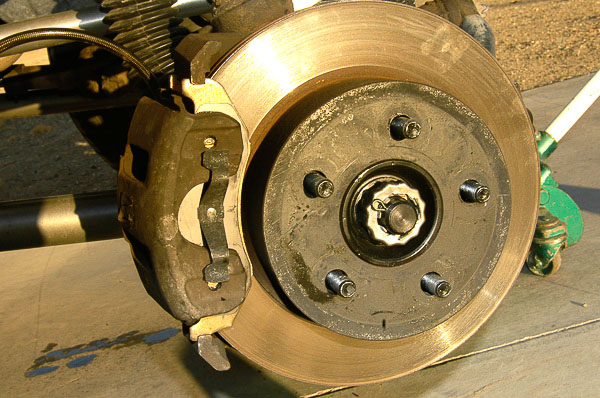
Illus. 23: I cleaned the rotors thoroughly and scuffed them lightly to break glaze and seat new pads. Check rotors for runout. These rotors will work well with new unit hub bearings and high performance brake pads. This package will deliver long, reliable service.
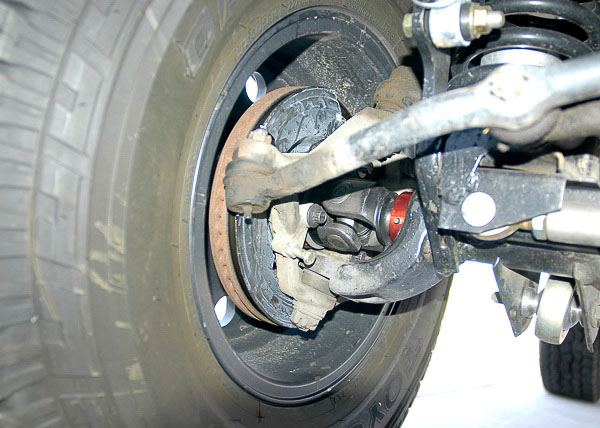
Illus. 24: This view shows the installed new unit bearing wheel hubs. On my ’99 XJ Cherokee, the axle shafts are heavy-duty Superior Axle replacements to accommodate oversized tires and ARB Air Lockers. New unit bearing hubs assure safety and reliability.
If you need a dealership-level Jeep® XJ Cherokee Service Manual, click here to access the Mopar TechAuthority II Website! You will also find subscriptions for technical information…
Composed with HTML Editor
