Jeep 4WD How-to: Late Model Preventive Maintenance and Routine Service
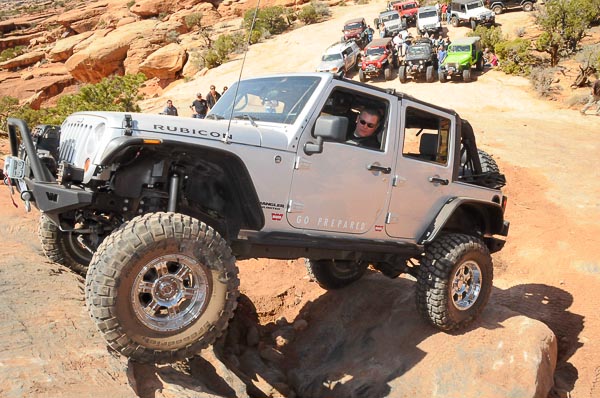
Jeep 4WD owners continue to access rugged and challenging trails! Here, Warn’s modified late JK Wrangler Rubicon 4-door boasts a complement of aftermarket accessories. Plying the rocks at Moab, Utah, this Jeep JK Wrangler 4WD demands preventive maintenance and punctual routine service!
The Jeep XJ Cherokee and each successive Wrangler 4WD design havec been performers in factory trim. They are also vehicles with minimal service demands. Off-pavement or on the highway, the modern Jeep 4WD strikes a balance between contemporary handling and agility, yet these models continue to deliver traditional Jeep light truck utility.
TJ or JK Wrangler Rubicon editions will outperform any previous Jeep 4×4 in stock form. In my view, a Wrangler Rubicon or properly upgraded standard model can outmaneuver any other mass-produced 4×4 in the world.
You can play a role in the Jeep 4WD performance scheme by performing regular and necessary service. This always begins with the lube, oil and filter service or “LOF”.
The Jeep 4WD Wrangler or XJ Cherokee is efficient, accessible and among the easier 4×4 trucks to service. There is less clutter, and access to routine service items is simpler and direct. Service orientation falls into the category of a traditional “truck”, yet electronics and onboard diagnostics play as much a role in the modern Jeep 4WD Wrangler or XJ Cherokee powertrain and chassis as any other contemporary vehicle.

Illus. 1: Shown here is a TJ Wrangler Rubicon special edition with less than 20K miles on the odometer. Serviced regularly by Jeep® dealerships, always a practical option, this Jeep 4WD is in showroom stock form.
Following the steps described in this article, you can not only perform routine maintenance, you can also become adept at finding critical service needs that affect your safety and well-being in rough backcountry travel or when plying icy winter roads. The properly maintained, modern Jeep 4WD is more than up for the challenge!
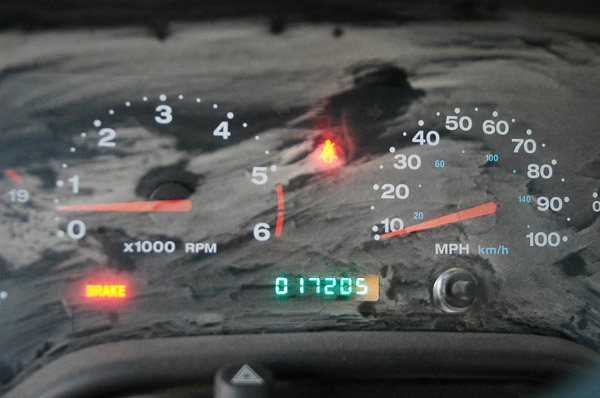
Illus. 2: Service is easier on a low mileage vehicle. This is the kind of pre-owned Jeep that used buyers should seek! A TJ Wrangler at this mileage can offer 150,000 more miles of trouble-free service.
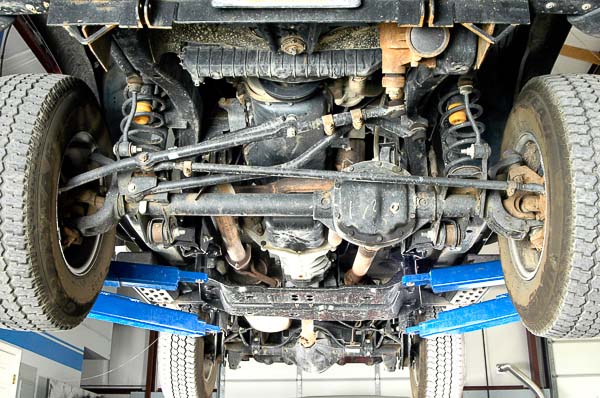
Illus. 3: Front to rear chassis view reveals the TJ Wrangler’s Quadra-Coil™ design and refined steering and suspension system. Despite improved ride and handling, the TJ and JK Wranglers still boast rugged iron beam (solid) front axles. Like the YJ, the TJ uses semi-floating type front axle shafts and wheel hubs. On contemporary Jeep 4WDs, this eliminates the need for periodic front wheel bearing service and simplifies routine maintenance.
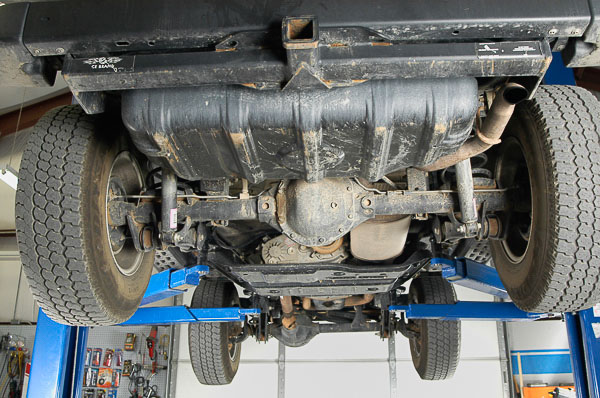
Illus. 4: This non-Rubicon TJ boasts the Dana 44 rear axle option. While Dana 35 and 35C axles have served nobly in the Wrangler, the 44 is clearly a more rugged and durable design. ’97-up TJ Wranglers offered this somewhat rare option. All Rubicon Edition TJs and JKs have Dana 44 axle assemblies both front and rear—with manual locker differentials! A Dana 44 rear axle option in a non-Rubicon TJ model includes Trac-lok™ limited slip.
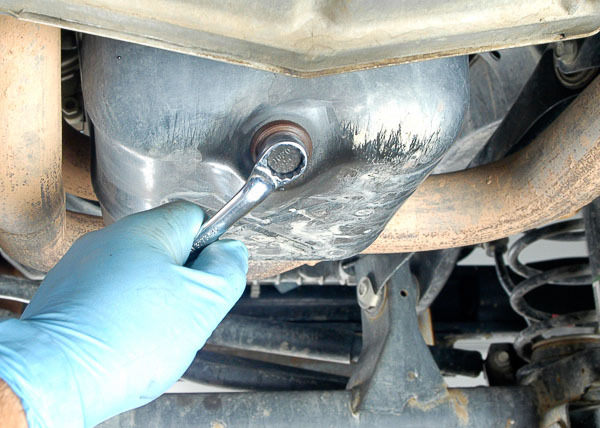
Illus. 5: A quick trip through the car wash readied this TJ for routine service. As you will see, this Jeep 4WD gets its share of off-pavement use! Here, bottom side service begins with removal of the engine’s oil drain plug. To avoid scalding yourself, oil should be warm but not hot. This 2002 TJ has a 4.0L inline six-cylinder engine. Set the drain pan far enough out to catch the stream of oil!
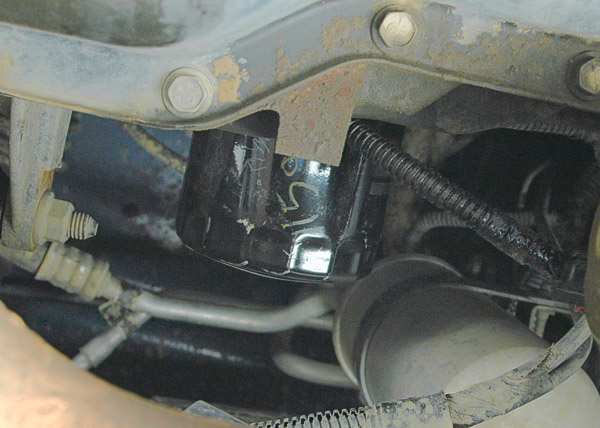
Illus. 6: The bottom side oil filter access is not easy. While you can remove the filter from here, many prefer access from under the hood. (On XJ Cherokee 4.0L engines, avoid shorting the oil filter against the heavy amperage starter motor leads!) Oil spillage is always an issue; oil runs down the side of the engine and oil pan rail. Wipe up afterward to avoid dirt accumulation.
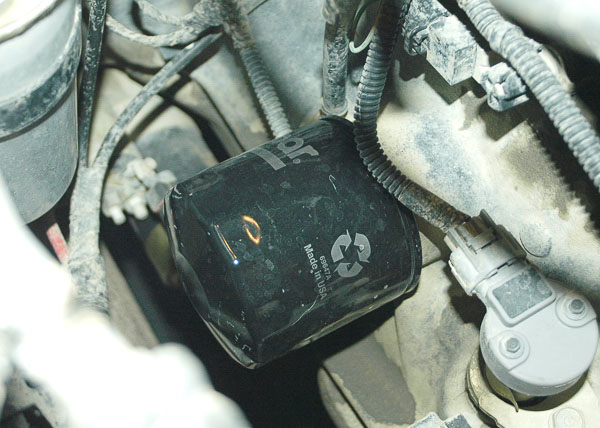
Illus. 7: Top side, you can readily reach the 4.0L oil filter. Once the filter is carefully removed, wipe the oil mount with a clean rag. Be very cautious here. You do not want debris to enter the engine oil passageways with the filter removed.While 95% of engine bearing wear occurs during start-ups, the more controllable bearing wear comes from debris and contaminants that do not get filtered out of the oil. A genuine Mopar oil filter (shown) is your safeguard for proper filtration, correct oil pressure drop across the filter and long engine life. Apply a film of clean oil to the filter gasket and tighten as indicated on the filter housing directions.

Illus. 8: Oil drained thoroughly, clean the drain plug and inspect the gasket or O-ring seal. Replace the gasket or plug if damage is evident. Thread the plug carefully into place by hand, and use a torque wrench to set final torque. Factory tightening data calls for 25 ft-lbs of torque on the 4.0L six.
Note: This 3/8-inch U.S. and Metric readout “click-type” torque wrench has been in my tool box for three decades. Periodic calibration assures torque wrench accuracy. Less expensive beam torque wrenches work fine and are reasonably accurate.
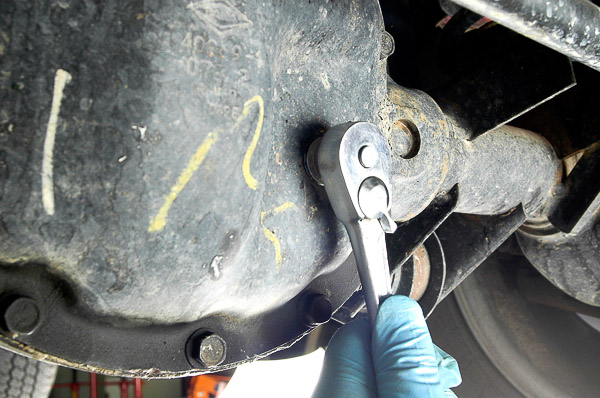
Illus. 9: Dana 30 front axle uses a simple 3/8” square drive insert plug. Fluid checks should be with the axle level. As this TJ is on a vehicle hoist, I expect the axles to drop. With suspension extended, axle fluids will rise at the drain plugs. For this reason, I am careful not to let fluid out. On level ground or a drive-on ramp hoist, fluid should reach the lower edge of the fill hole.
Note: When in doubt, check the axle fluid with the vehicle level and on flat ground. Do not overfill. Use fluid recommended on axle tag or in your Jeep owner’s handbook.
Caution: A used Jeep 4WD may have an aftermarket limited slip, locking differential or other special axle equipment. If you are unsure of the differential type, remove the inspection cover and identify the unit. Use the recommended gear lubricant and any additives that support the differential design.
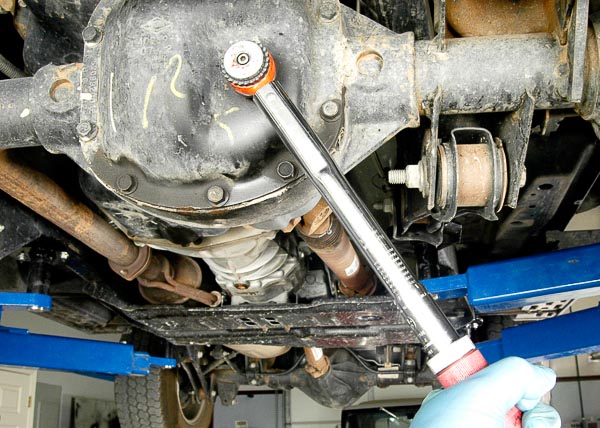
Illus. 10: Judging the angle of the suspended axle, I hold the plug close to the threads and simply loosen it enough to verify that fluid is full. Without losing more than a drop or so of fluid, immediately begin threading the plug back into the cover. With the axle on this angle, fluid will be high around the plug. Conveniently, a 3/8” drive torque wrench will fit the square plug insert. 25 ft-lbs will suffice on this TJ Wrangler Dana 30 axle plug.

Illus. 11: This newer TJ with low mileage still gets off the pavement! Rear differential cover is dirty, and the identification tag cannot be read. I will not remove the plug without first cleaning around the threads. It is also useful to get details on the axle design and ratio when servicing the vehicle. Clean the housing and I.D. tag before proceeding.
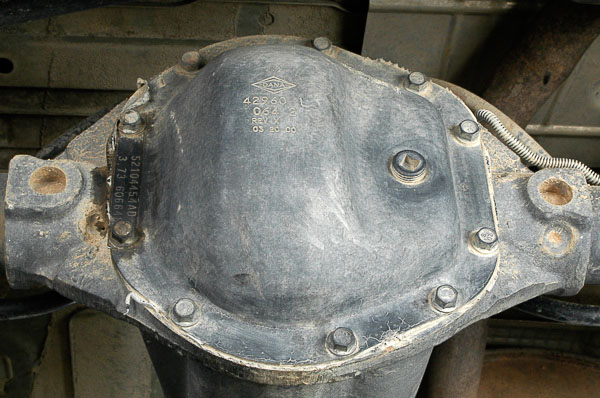
Illus. 12: Here, I have cleaned off the cover with a rag dampened with solvent. I use a low-pressure air nozzle to blow stubborn debris away from plug threads. (Protect your eyes when using pressurized air around dirt!) The I.D. tag reveals facts. This is a Dana 44 axle option. These units come with Trac-lok™ limited slip. From 1998 up, the ratio is 3.73:1 on the ring-and-pinion gears. The tag tells us the lubricant Jeep-Mopar recommends.

Illus. 13: Lubricant type is crucial. The owner’s handbook and Mopar recommendation is 75W-140 Synthetic Gear Lubricant for severe duty use. Also, since this unit has limited slip Trac-lok™ as part of the package, Limited Slip Additive from Mopar is essential. During a routine service, you merely check the fluid level. When draining and refilling a Trac-Lok™ axle unit, Limited Slip Additive is part of the fill. A 4 oz. bottle suffices for this application. See your Jeep® handbook and the axle tags for details on lubricant requirements.
Note: For a fluid change, drain the axle and install the cover. Pour additive into the axle first to make sure the entire additive portion gets in there! Proper limited slip clutch plate performance depends upon this additive. If the axle chatters or tires chirp on turns, your Jeep’s rear axle may need LS Additive.
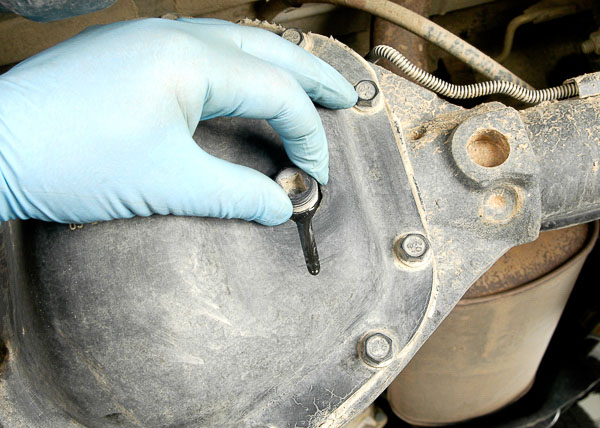
Illus. 14: With the axle suspended, I carefully pull the fill plug to its last thread. The axle has been setting awhile, so this is an accurate read on fluid level. Pull the plug away just slightly to verify that fluid is full. A drop or so leaking out is enough verification. (If in doubt, check the fluid with the vehicle on level ground.) At this point, immediately restart the plug into the cover threads.
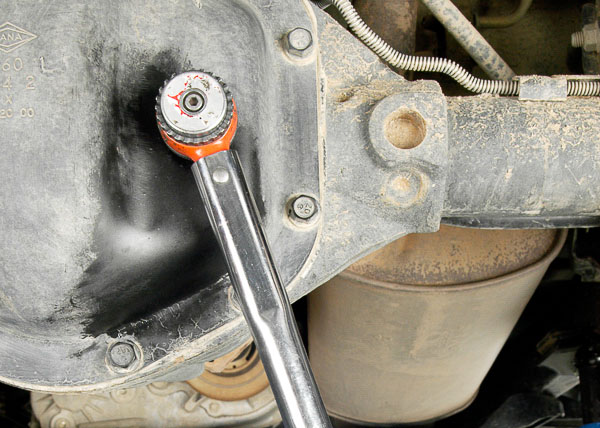
Illus. 15: Like the Dana 30 front axle’s plug, this 3/8” insert allows easy use of a ratchet or torque wrench. I set the plug torque to factory recommended 25 ft-lbs to assure a good seal and no risk of loosening. Over-tightening could cause difficult removal of the plug. Rounding the square insert of the plug would create a real problem. Follow factory torque specifications.
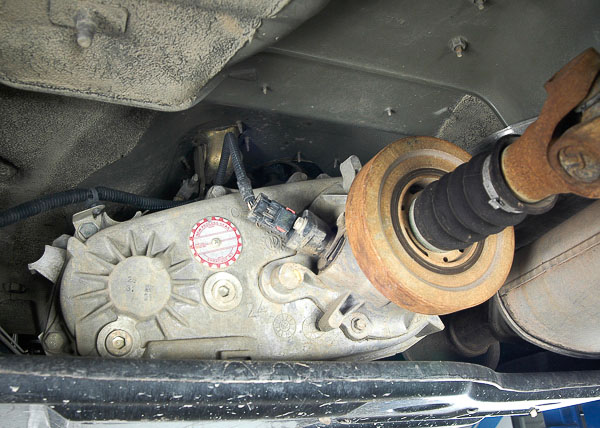
Illus. 16: The NP/NV231 transfer cases are popular in YJ, TJ and XJ models. (The Rubicon Wrangler uses the NV241 Rock-Trac™ unit.) By this 2002 model, the output shaft has a damper to quell driveline vibration. TJ Wrangler drivelines require no routine maintenance: the rear slip yoke has a bellows seal; U-joints are permanently sealed; and the front driveshaft has a slip collar with a clamped bellows grease boot. Beyond inspection for wear, torn boots or looseness, no service is necessary until the driveline needs repair or rebuilding.
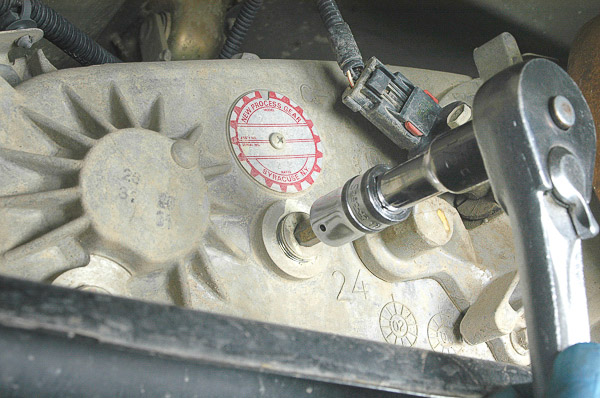
Illus. 17: Fill plug on this NPG 231 unit is tapered pipe thread. Socket size is 10mm hex. Make a point of using the right socket here, as rounding of the hex in the plug would create a real issue. Seat the tool completely in the plug then loosen with a ratchet.

Illus. 18: Proper lubricant for this application is Dexron III/Mercon ATF from Mopar. I use factory fluids wherever possible, as formulation is critical. Late model automatic transmissions, in particular, do not work well with non-factory formulations. Proper clutch pack operation is predicated on the use of specific fluid types and additive packages.Tighten 10mm hex plug to no more than 25 ft-lbs.
Note: Years ago, I substituted aftermarket synthetic oils in most applications. I exercise caution these days and know that Mopar offers specially formulated synthetic or non-synthetic fluids.
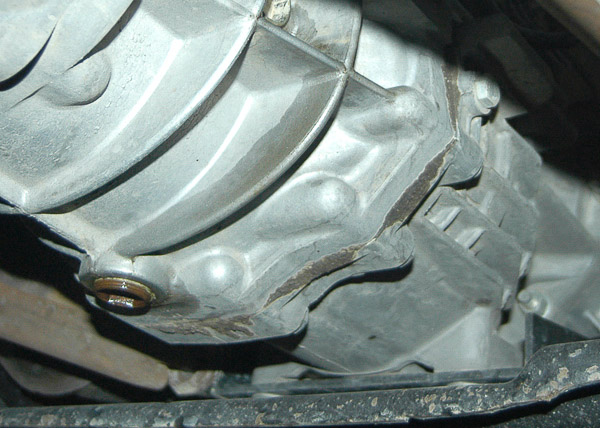
Illus. 19: Here, drain and fill plugs are visible on this NV3550 five-speed manual transmission. The NV3550 is the 2000-up replacement for the AX-15 in six-cylinder TJ models. I like this transmission for its ruggedness, ease of shifting and fitment. The NV3550 is popular as a retrofit in earlier applications. Fill and drain plugs take a 17mm hex head wrench or socket.
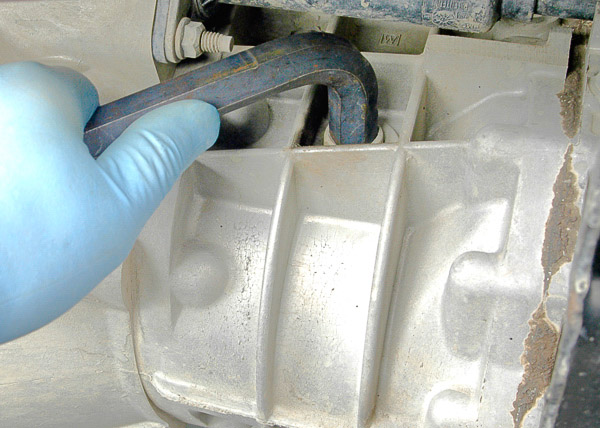
Illus. 20: Special factory lubricant is expensive and lasts a long time between changes. Clean around plug area and loosen plug carefully. The case was full here, and I quickly reseated the plug. I am using a hex wrench to loosen and tighten the plug. Experience has taught me the proper “feel” for tightening here. If you have limited experience at tightening hardware, I recommend the use of a 17mm hex socket. Torque the NV3550 plug to 25 ft-lbs.
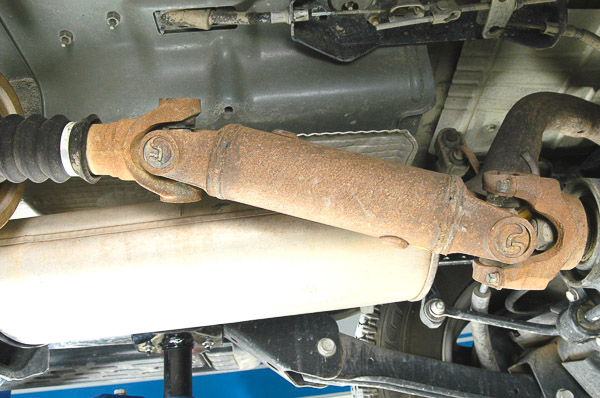
Illus. 21: The rear driveline requires zero maintenance! U-joints are permanently sealed type. The slip-yoke has a sealed grease boot with clamps. Service here is inspection for wear, tears in the grease boot and damage to the shaft. Look for dents, dings and play at joints. Replace worn joints or a torn boot.
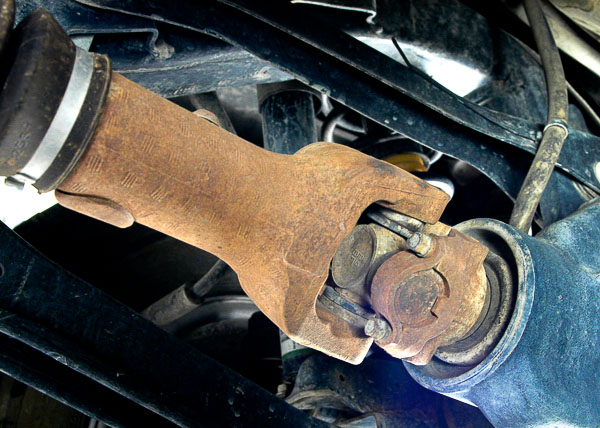
Illus. 22: Permanently sealed U-joints are a leap forward. Without grease passageways through the cross, these are strong joints. Replace U-joints with Mopar or OEM exact replacement joints. Spicer-made items last. You cannot get a regular grease gun tip into the narrow gaps between flanges. Such a grease fitting is difficult to access here.
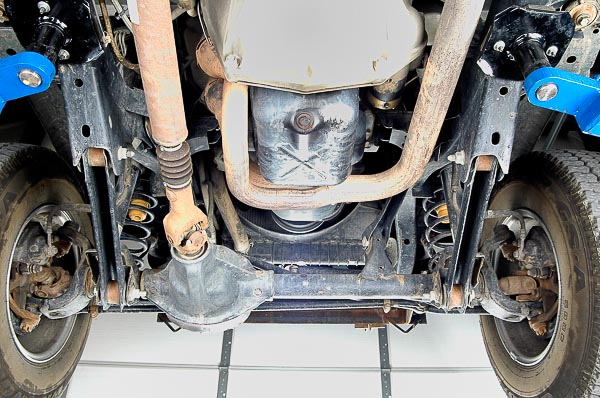
Illus. 23: The front driveshaft slip collar is sealed with a bellows boot. During factory assembly, the sliding parts and boot get greased. The only service needed is when either the boot wears or tears. Otherwise, you can expect this front driveshaft, like the rear slip-yoke, to work for a long service life. Rebuilding the shaft takes new joints, fresh slip collar grease, a new boot and boot clamps.
Note: This design is typical of late model OEM approaches in the automotive and light truck field. Maintenance needs have been dramatically reduced. When driveline trouble develops, it is often practical to replace the OEM driveline with a heavy-duty new one.

Illus. 24: Buried near the transfer case is this double-Cardan joint on the front driveshaft. Fortunately, these U-joints are permanently greased and sealed! I could barely access this area for a photo—imagine how difficult it would be to grease two needle-point grease fittings. There is no need for service between driveshaft rebuilding times, and that should be a long interval for a rugged Jeep 4WD!
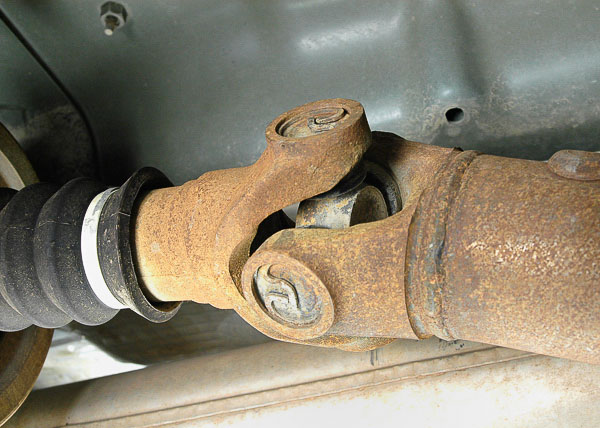
Illus. 25: A closer look at the new style U-joints reveals an obvious improvement: The cross yoke, rounder and more solid, increases the stamina of this joint. Permanently sealed and greased from the factory, these joints provide the benefits of modern technology and maintenance-free service.
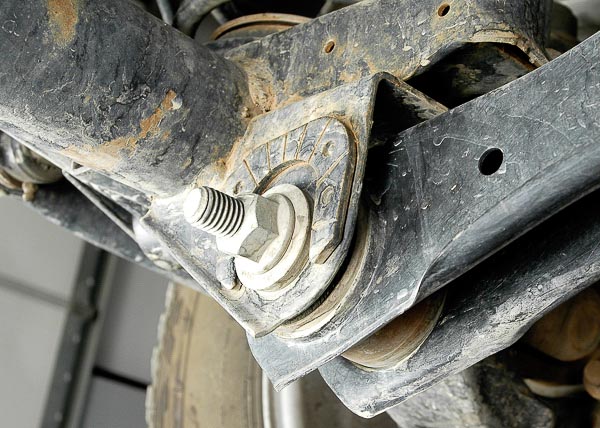
Illus. 26: Caster adjustment at the front beam axle uses eccentric fasteners. Setting caster on a solid axle also changes the pinion shaft/front U-joint angle. Jeep positions the front axle by the front driveline U-joint angles. If wheel/steering knuckle caster angle is still close to specification, that’s optimal. The OEM priority, however, is to reduce driveline stress and vibration.
Caution: Improperly designed or poorly installed suspension lift kits can have an adverse effect on caster angle and driveline angle. Vibration and premature U-joint failure can result. Insufficient degrees of (negative) camber can cause a “death wobble,” which is actually the time-honored “kingpin shimmy” associated with either loose parts or lack of caster angle on a beam axle. For more details, read the many suspension, steering, driveline and lift kit articles at the 4WD Mechanix© Magazine website.
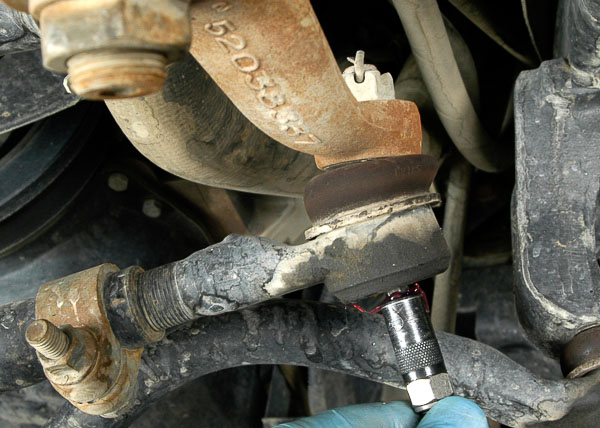
Illus. 27: Greasing the chassis components on a TJ begins—and ends—at the front end. There are a minimal number of grease fittings on a TJ or JK Wrangler. Joint shown here is the drag link-to-pitman arm at the steering gear. Note that there is a bell type seal here. Wipe the fitting clean and squeeze small amounts of grease into the joint until the seal expands slightly. Do not fill this bell seal to the point that grease runs out the base of the seal—or worse yet, to the point that the seal ruptures! Wipe excess grease off the joint.
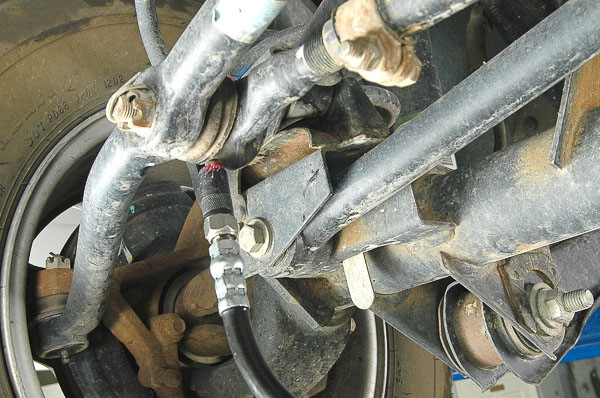
Illus. 28: Follow the drag link (‘short tie-rod’) down to the long tie-rod that connects the two steering arms. Wipe the fitting and apply only enough grease to swell the dust seal slightly. Wipe off the fitting. A hand grease gun controls the amount and pressure of grease applied, optimal for this kind of service work.
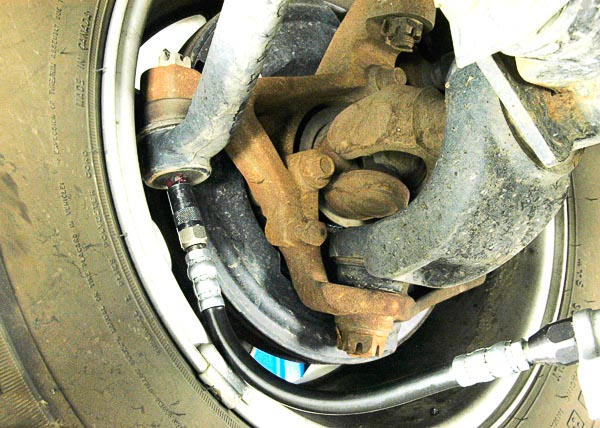
Illus. 29: The right tie-rod end is close to the drag link joint. Again, use discretion when adding grease. Slight swelling of the dust boot is enough here. Wipe the fitting clean before applying grease. Wipe off fresh grease from the fitting when done. Lubrication assures long service life from parts.
Note: I use Mopar® recommended greases or Texaco’s Starplex II grease for superior service and good resistance to moisture. Intact seals are the best defense against debris and water entering a joint.
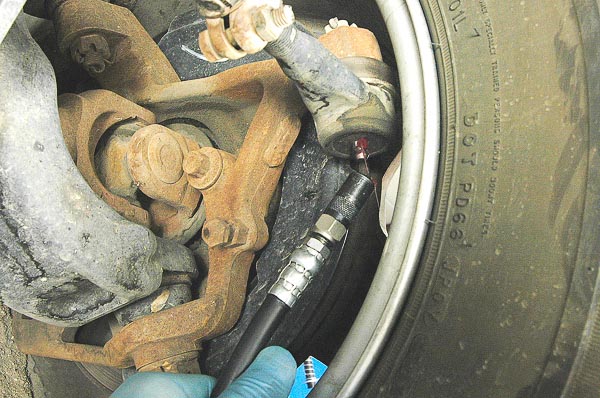
Illus. 30: Move to the left tie-rod end to complete the steering linkage lubrication. Wipe off the fitting before applying grease. Apply just enough grease to swell the dust seal slightly. Do not overfill the joint. The goal is to supplement the grease, not to displace it. Unlike older flap type dust seals, the bell-shaped and bellow seals form a tighter seal intended to prevent moisture and dirt from entering the joint. Protect these seals. Wipe away excess grease after lubing the chassis joints with your hand grease gun.
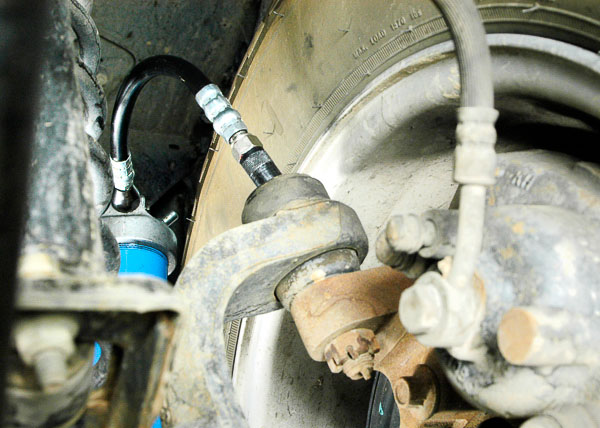
Illus. 31: The YJ and TJ steering knuckle ball joints often get overlooked. Axle shafts running through the open knuckle make a lower ball joint grease fitting impractical. Wipe dirt off the upper grease fitting and apply grease cautiously. Do not overfill, add just enough grease to swell the dust boot slightly. Wipe off the fitting.
Note: On 1972-86 Dana 30 front axles with a different ball joint layout, there was a permanently sealed upper and lower ball joint at each steering knuckle. From the YJ Wrangler forward, a re-designed steering knuckle makes the upper ball joint’s base accessible for a grease fitting. These joints require lubrication.
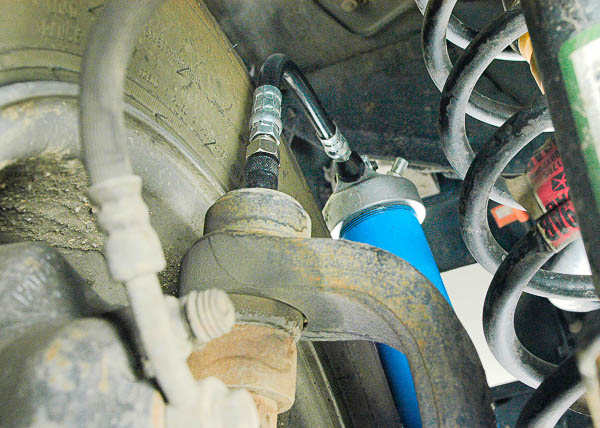
Illus. 32: Move to the right upper ball joint and repeat the task. Wipe the fitting off, apply just enough grease to swell the boot slight, and wipe grease away from the fitting. Do not apply too much pressure to the dust boot. The idea is to replenish grease, not to displace it. Use a high quality automotive chassis grease, NLGI rated at least “LB,” preferably “GC-LB” rated for wheel bearing and chassis use. Optimally, use the Mopar-recommended lubricant.
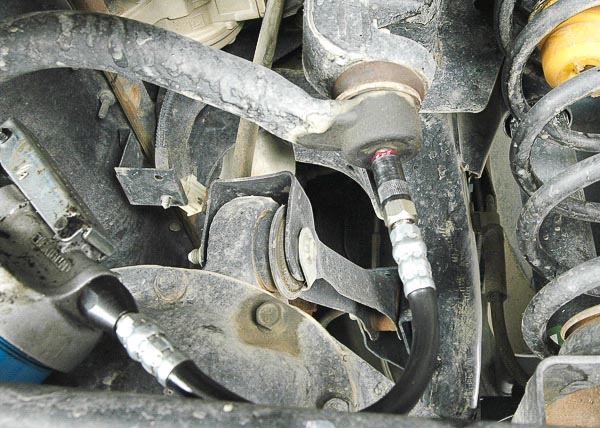
Illus. 33: This is the last chassis fitting to address on a TJ Wrangler. The track bar joint at the left frame rail bracket has a grease fitting. Wipe this fitting clear and grease the joint. Add just enough grease to swell the dust boot slightly. Wipe off grease from the fitting, and put away your grease gun! There are no fittings at the rear of the chassis or anywhere else on the TJ Wrangler…Know the number and location of grease fittings on your Jeep 4WD.
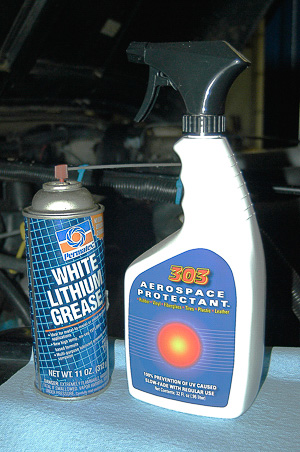
Illus. 34: Shift rods, pedal pivot points, suspension link arms, shock absorber grommets and other moving mechanisms have bushings designed for long, maintenance-free service. I use white (lithium) spray on hinges and bushings made of nylon or plastic. On rubber bushings and grommets, ‘303’ Protectant spray will help resist squeals, deterioration, UV damage and wear.

Illus. 35: Now you’re out from beneath the truck! The underhood chores can begin with filling the engine oil to the capacity noted in your owner’s handbook. Allow for the filter change. While the oil pours into a stable funnel, you can move to other chores. Use the viscosity and rated oil described in your owner’s handbook. Ambient, seasonal temperatures make a difference. A thinner pour factor like 5W is vital in extreme wintertime weather. 10W-40 or even 15W-50 might be best in extreme desert heat. When available, use the recommended Mopar® motor oil.
Note: For a thorough discussion of oil and lubricants, see my Jeep® Owner’s Bible (Bentley Publishers).
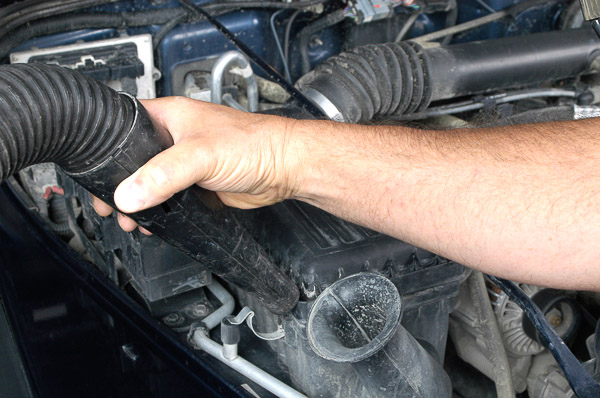
Illus. 36: Keeping the air box clean and sealed is crucial to engine performance and longevity. Dirt entering the engine can prove disastrous to piston rings and valves. Jeep has done a quality job of filtering induction air on the 4WD models. The air box is well located, with the TJ’s intake snorkel pointed away from heavy dust and the water spray of stream crossings. A deep box helps debris and moisture settle out—or at least dissipate before reaching the filter—and the filter area is large. Vacuum dirt away from the air box lid before opening the lid.

Illus. 37: With dirt cleaned away from the air box lid, locate the (five) clips that hold the lid down. This is an easy access filter that works well! On a 2002 Jeep TJ Wrangler 4.0L model, four of the clips lie on opposite sides of the long section, and the fifth clip is at the rear of the box. Make sure all clips are loose and folded outward before attempting to lift the lid. There should be little resistance. Raise the lid straight up.
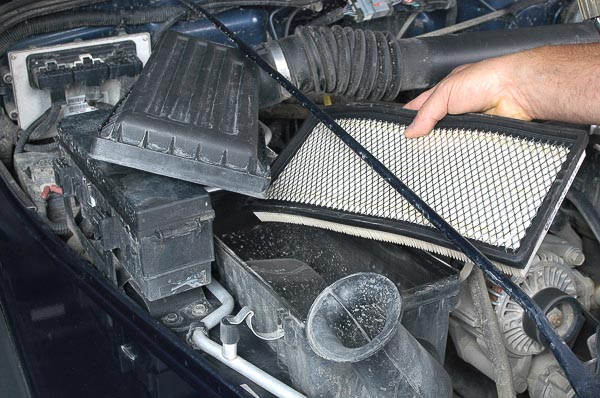
Illus. 38: I raise the lid and carefully set it aside, leaving enough space to remove the filter element. Once the old filter is lifted from the box, you can take the shop vacuum and continue cleaning debris from inside the box and around the lid. Time spent doing this will prevent premature clogging of the filter and reduce the risk of contaminants being drawn into the engine. Note that air draws through from beneath the filter cartridge—the filter’s top side and upper box must be clean and well sealed!
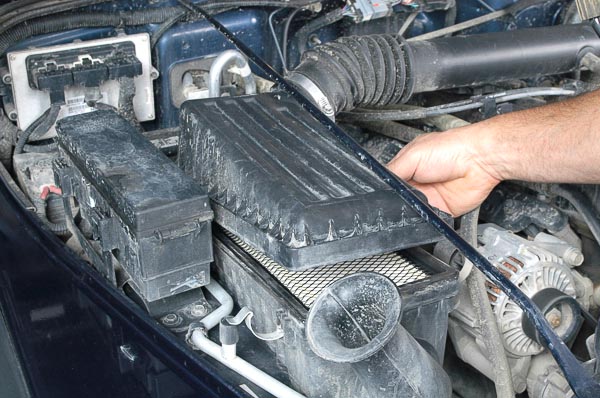
Illus. 39: Make sure that the filter seats all the way around the box top. This is a new Mopar filter, a very good choice! Set the lid carefully over the edges of the new filter, centering the lid to keep the filter seated. Press the lid gently into place. Make certain that the filter remains seated; the lid must fit squarely and fully seated before you fasten clips.
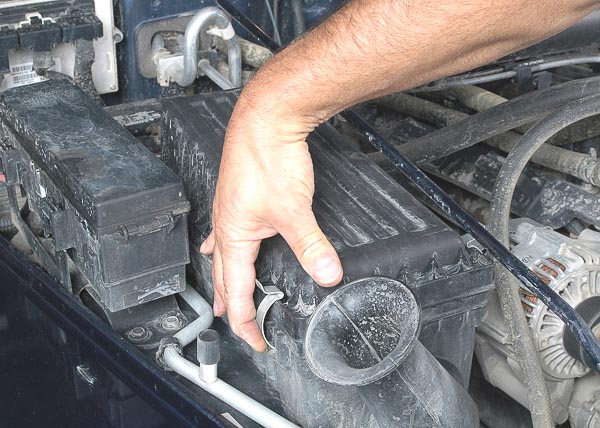
Illus. 40: Latch a pair of opposite clips in the long section of the box. I begin with this clip and move to the diagonally opposite clip. As you fasten the clips, there should be a minimal amount of resistance. Press on the arching section of the clip to extend the catch end. Make sure each of the clips latches securely. When off-pavement in clouds of dust, this is your engine’s source of clean, fresh air. Protect the engine!
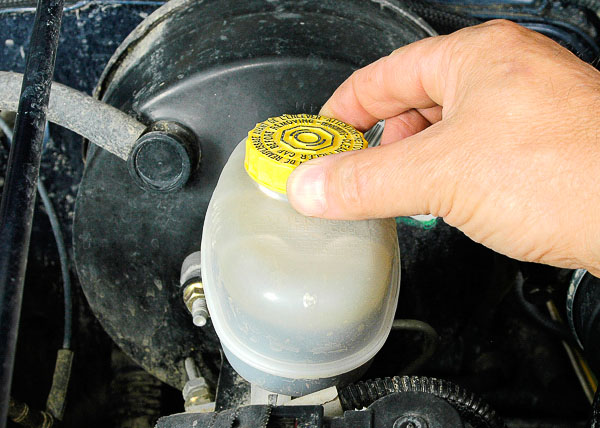
Illus. 41: The brake master cylinder cap on this TJ Wrangler is transparent. It is easy to spot-check the fluid level. At the sides of the cap, ‘Maximum’ and ‘Minimum’ lines indicate where the fluid should stand. If you need to remove the cap for filling, be sure to prevent dirt and debris from entering the master cylinder.
Caution: When handling the master cylinder and cap, make sure your hands or gloves are clean and free of dirt, abrasive material or any kind of oil. Use a clean container of fresh brake fluid, the type indicated on the master cylinder cap. If in doubt about whether to use DOT 3 or DOT 4 fluid, consult the owner’s handbook for your Jeep model. Your Jeep dealer has genuine Mopar brake fluid.
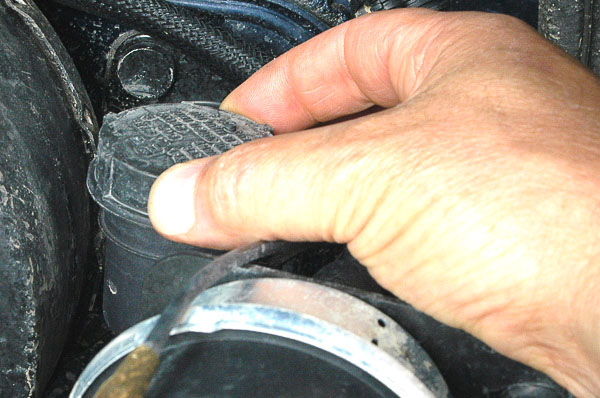
Illus. 42: This Jeep clutch master cylinder has a non-transparent bowl and cap. Again, be certain not to introduce contaminants of any kind into the clutch fluid. On the clutch master cylinder cap, note which type of brake fluid is recommended. Your owner’s handbook or Jeep dealer’s parts and service department can clarify if necessary. Use the brake fluid recommended by Jeep. The correct Mopar product is always a safe approach.

Illus. 43: Clear debris from around the power steering cap before removing the dipstick. This TJ visited the self-service car wash, and the engine bay is now cleaned thoroughly. Use a clean, lint-free rag to wipe the dipstick. Dip the stick until the cap seats fully then lift the stick straight up. The fluid should not be over the full mark or below the add line. Note the temperature levels on the dipstick.
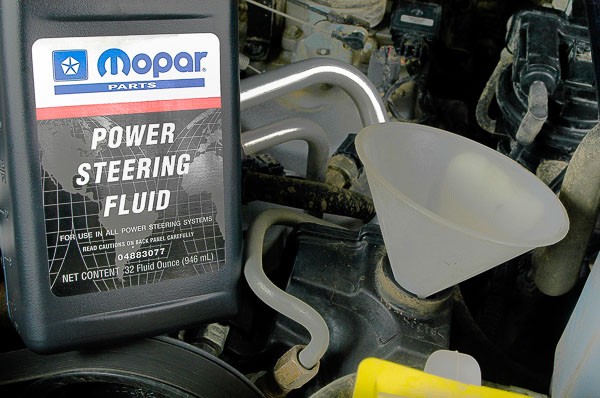
Illus. 44: If the dipstick has a “Cold” line and the vehicle has cooled completely, top off power steering fluid to the “Cold” line. If there is a “Hot” line and no cold mark, wait until the vehicle has been driven, and check the fluid level while hot. Fluid should never read below the “Add” line, either hot or cold. Use only the specified Mopar power steering fluid. Modern power steering fluid is not red ATF. It is clear and specially formulated for use in the power steering gear assembly and pump. Do not mix fluids. See your Jeep dealership for Mopar Power Steering Fluid.
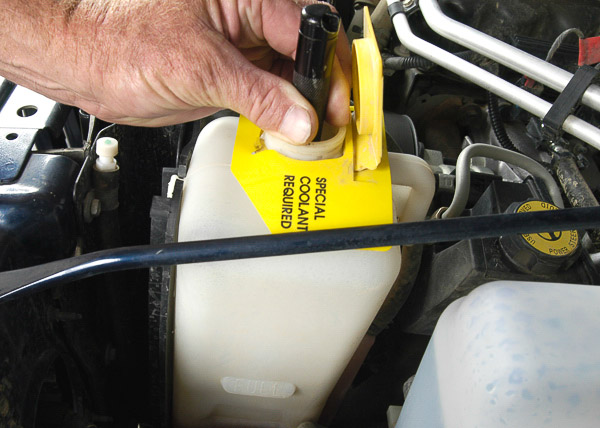
Illus. 45: The coolant bottle is transparent. On this TJ, however, the fluid level was not clear. A clean mini-flashlight illuminates the interior, highlighting the fluid level. (Do not drop the flashlight into the bottle!) Fluid color is orange for this 2002 Jeep TJ Wrangler model, an important distinction. Use the correct anti-freeze!
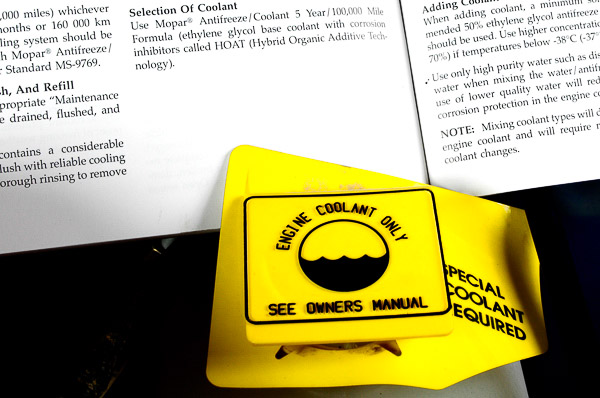
Illus. 46: All anti-freeze is not the same. This TJ Wrangler has the factory fill, and the color is orange, not green. The Jeep owner’s handbook in the glovebox specifies the correct fluid for this 2002 4.0L engine, and it calls for extended service Mopar long-life orange anti-freeze/coolant. On late model vehicles, note the color and type of anti-freeze recommended. The owner’s handbook is a reliable source, and so is your local Jeep dealership’s parts department.
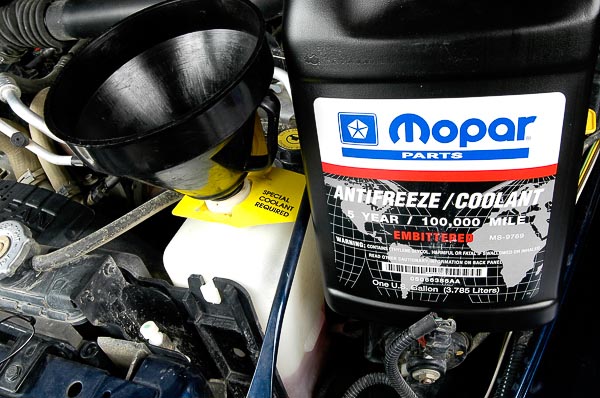
Illus. 47: This is long-life, orange anti-freeze specified for this application. You cannot mix green and orange anti-freeze. Fluid will break down and fail to perform properly. Incompatible chemistry can lead to serious cooling system damage. Your safest choice is Mopar, the source for the original fill. Top-off and flush/refill of the system is not that often, and it is cost effective to stay with the recommended variety of genuine Mopar coolant and anti-freeze.
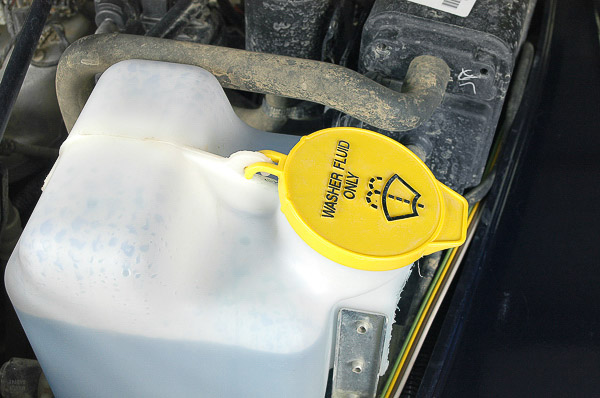
Illlus. 48: Winter slush on the highway, mud spray from the Jeep 4WD on the trail ahead—take your pick! There’s always a need for washing the windshield—often miles away from a car wash. Top off the washer fluid at routine service intervals. Use Mopar washer fluid when available. Make certain the fluid you use has adequate winter freeze protection! Minus 20° F is a practical minimum. Typically, -34° F is advisable. If you add cheap washer fluid without adequate freeze protection, the washer lines, the tank and the pump can freeze and break—costly repairs!
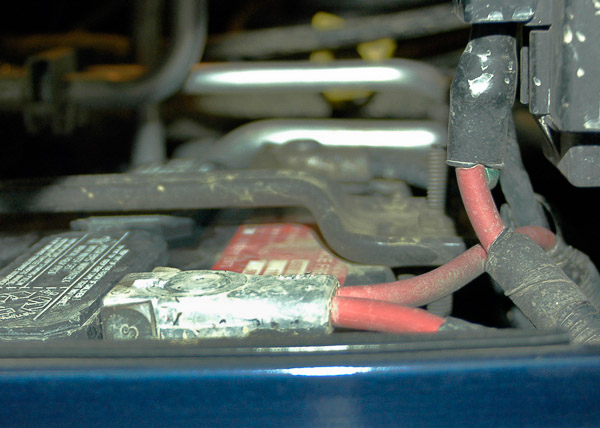
Illus. 49: Factory Mopar batteries in the YJ and TJ Wranglers are not permanently sealed. They require water checks and top-offs at each routine service interval. Use only distilled water specified for use in batteries. This means pure water—no minerals added! Check cables for wear, corrosion and signs of not conducting properly. Clean posts and cable ends when necessary. Consider post and cable cleaning as part of your pre-cold weather service.
Note: See the troubleshooting section of the website/magazine for details on cleaning the battery and tips on performing quick field tests. Better yet, perform these battery checks at home, before you hit the remote trails!

Illus. 50: A single serpentine belt drives the air conditioning compressor, power steering pump, alternator and water pump. If this single belts fails on an icy highway, backcountry trail or in sweltering summer stop-and-go traffic, you and your Jeep are in trouble. Check this belt for wear, fraying, rib cracks and other signs of fatigue. Replace the belt at the earliest sign of trouble, and carry a spare—either a good used belt or a new one from Jeep/Mopar!
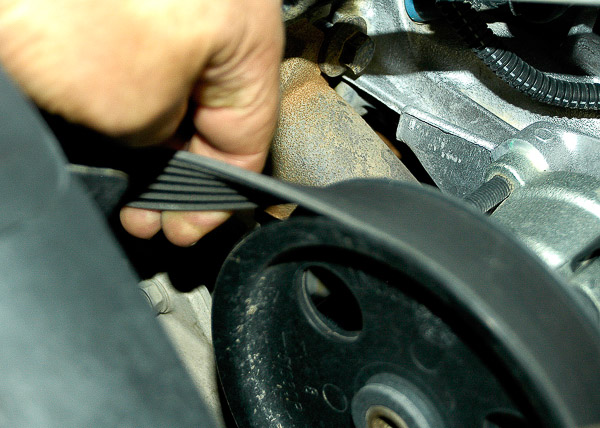
Illus. 51: Engine shut off, key removed from a locked ignition switch, the ignition clearly disabled—you can now roll the edge of the serpentine belt over. Examine ribs for cracks or fraying—flat side of the belt and rib edges. These are tough belts, designed to handle a lot of torque and load over time; however, they’re not exempt from wear or failure!
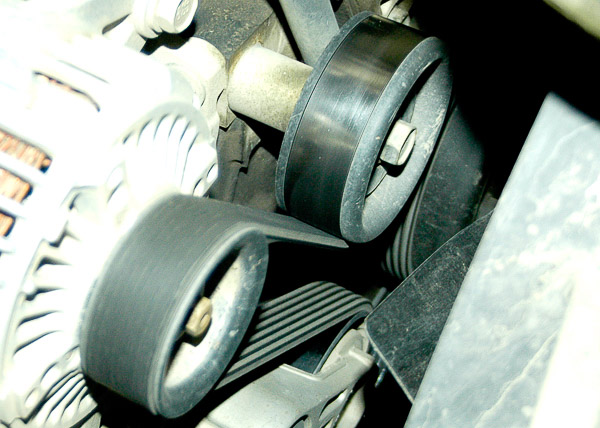
Illus. 52: This 4.0L belt drives both ribbed pulleys and flat pulleys. Ribbed pulleys drive from the inside of the belt, while the flat outside of the belt drives the water pump and other flat pulley surfaces. Typically, there is a tensioner and an idler pulley. In some Jeep installations, the idler pulley and tensioner are one and the same. Some earlier Jeep YJ Wrangler models with 2.5L four-cylinder engines use V-belts.
Note: Beginning with the late CJ era, serpentine and V-belt drives were often used in the same model years—on the same engine type! This carries over to the early YJ era. By the early 1990s, all Jeep engine belts were serpentine type.

Illus. 53: This Jeep engine belt routing decal (right side) is a valuable tool. Even professional mechanics waste precious time trying to figure out the routing of a single belt. If you are in the field and need to replace the serpentine drive belt, this is your “map”! With basic tools, you can replace the belt.
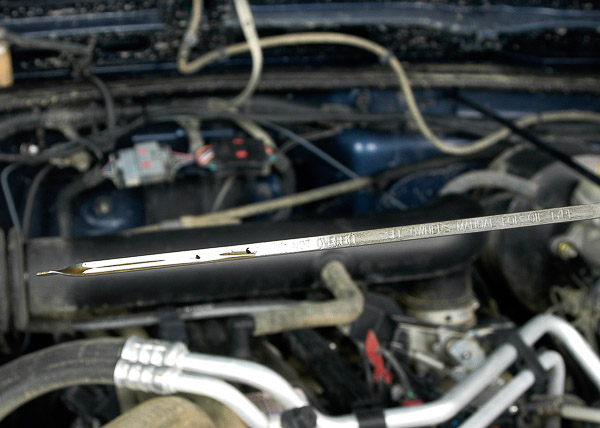
Illus. 54: With the engine’s crankcase full, your underhood chores are now complete! Start the engine and run it for several minutes. Watch for leaks around the oil filter and drain plug. Drip-free, you are ready to go ‘wheeling. A quality job!
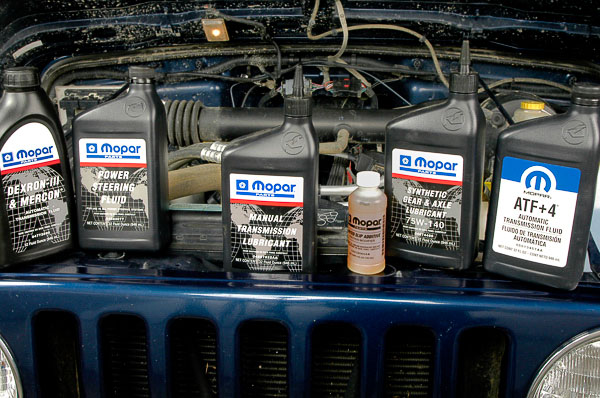
Illus. 55: These are the official Mopar products that I use on our Jeep 4WD vehicles. Each has a special application. Check the owner’s handbook and local Jeep dealer’s parts department to make certain that your Jeep stays like new—with fully compatible fluids. Mopar now offers synthetic lubricants where appropriate, items like the 75W-140 Gear Lubricant pictured here. When Mopar provides this level of protection, buy it!
Where the Rubber Meets the Road—and Windshield!
Two often neglected items in routine service are tires and wiper blades. Jeep tires and wipers need attention, too! Check the tires for cuts, damage, signs of belt separation and inflation pressure. Examine wiper blades for embrittlement, degradation and tearing. Off- and on-pavement, these rubber products assure your safety and safe passage.
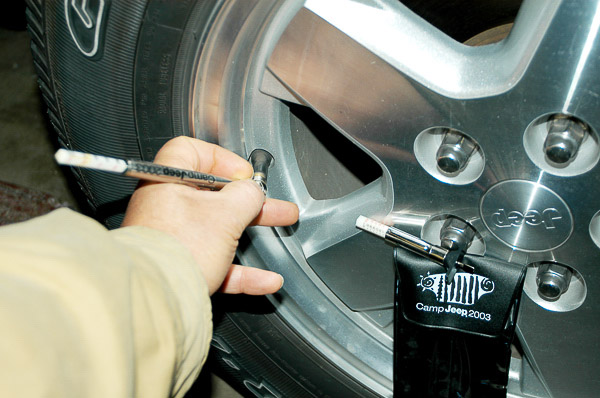
Illus. 56: Tires do fail in the backcountry. Trail obstacles, sharp rocks and under-inflation stress from “airing down”—each takes its toll. Airing down actually reduces the load capacity of a tire—often at a time when the highest stresses apply! Routinely check tire condition and air tires to proper inflation pressures. Correct pressure for OEM tires is indicated on a door sticker. (Consult your tire installer if tires are oversized.) Always check tire pressure cold, after the vehicle has set for some time.
Advice: Keep a constant guard against damage. Consider your spare tire a vital backup—check its pressure, too! 303 Protectant can protect the tire sidewalls from UV damage and will not attract dust.
Statistic: On U.S. highways, one in four vehicles has under-inflated tires, tires that are stressed and more vulnerable to a blowout! Always air your Jeep tires after leaving the dirt trail.
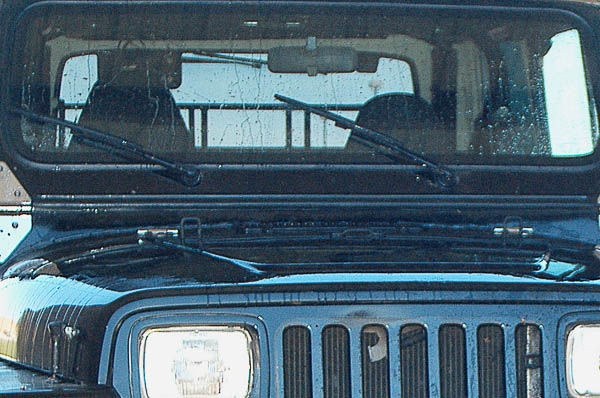
Illus. 57: Take a close look at the wiper blades. Pull them away from the windshield and feel the blade edge. Look closely for signs of fatigue or brittleness. Wiper blades take a tremendous amount of punishment, even when not in use. UV damage, bugs, road debris, acid rain, you name it, the wipers get a heavy dose! A blade may look okay at a quick glance yet tear the first time you call on it to swipe the windshield!
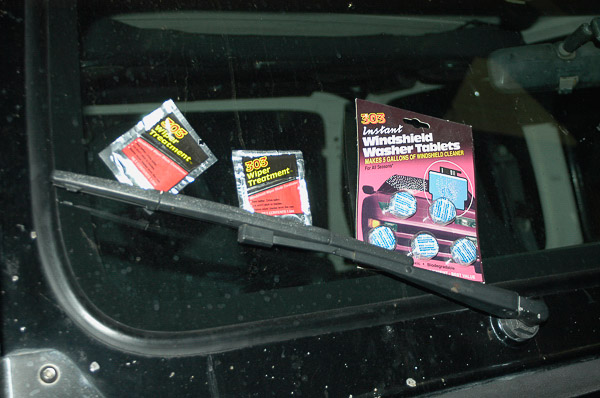
Illus. 58: UV damage and ozone degradation can be offset by the use of these ‘303’ products. Often, brand new blades need a 303 Wiper Treatment! Wiping blades with 303 will make them more pliant and able to lay against the windshield surface. This will eliminate skipping and protect the blades from environmental damage. As an added benefit, 303 Wiper Treatment will reduce the risk of ice sticking to the blades. When blades need replacement, see your Jeep dealer for genuine Mopar all-season wipers!
