

Whether it’s the legendary longevity of a Jeep XJ Cherokee or just the nature of manual electric switches, the power window and door lock switches do wear out over time. The troubleshooting will be easier with a factory workshop manual for your Jeep XJ Cherokee. At left is the original right side front window and door lock switch for our 1999 Jeep XJ Cherokee four-door model. A new replacement Mopar switch is at right.

The symptoms for a defective right front door lock and window switch on our 1999 Jeep XJ Cherokee were three-fold: 1) the passenger could not operate the power window or door lock, 2) the driver could not operate the passenger window or any door locks, including the rear hatch door, from the driver’s door switch panel, and 3) the remote key fob door lock activator did not work. The driver could operate the other three power windows. Switch replacement begins with the door panel removal.


Here are the official functions of the Driver and Passenger Door Modules (switches):
“A Driver Door Module (DDM) and a Passenger Door Module (PDM) are used on all models equipped with power locks and power windows. Each door module houses both the front door power lock and power window switches. In addition to the switches for its own door, the DDM houses individual switches for each passenger door power window, a power window lockout switch and the power mirror switch. The PDM contains the control circuitry and the power lock and unlock relays for the entire power lock system.
“In its role as the power lock control module, the PDM receives inputs from the battery, the ignition switch, the DDM, the driver door ajar switch, the key-in ignition switch, and the headlamp switch. It also receives a hard-wired input from the remote Keyless Entry (RKE) receiver, if the vehicle is so equipped. In response to these inputs, the PDM sends the proper outputs to control the power lock motors through its integral power lock and unlock relays.
“The DDM and the PDM are mounted to their respective front door trim panels. The DDM and PDM are serviced individually and cannot be repaired. If the DDM or PDM, or any of the switches and circuitry that they contain are faulty or damaged, the complete DDM or PDM unit must be replaced.”
Our system’s symptoms met each of the requirements for a defective PDM. We ordered the right front door switch from a Mopar source. Practical troubleshooting can save considerable time and money. If you’re having trouble with a diagnostic procedure or isolating a symptom, the 4WD Mechanix Magazine ‘Tech and Travel’ Forums provides a free information resource…In our case, the right front door module (PDM) contains a range of functions and potential trouble symptoms!


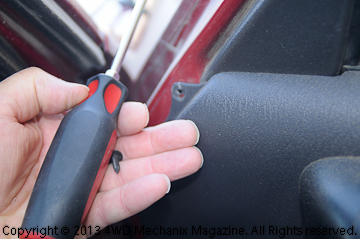
There are three large screws supporting the armrest on the 1999 XJ Cherokee. Remove all screws before attempting to unclip the panel. At right, carefully slide your hand or a plastic putty knife behind the panel and find the plastic clips. With a light hand, you can loosen the panel without destroying the push clips. Do not force parts. Replace broken or distorted clips as needed.
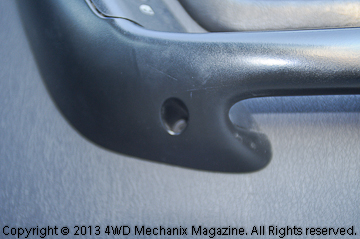

Make sure all screws are out. Separate the panel clips from the door’s metal skin. Do not damage the plastic sheet cover that fits between the panel and metal door body. These parts must all be reused if possible. The plastic push clips can be found at an auto parts house or your Jeep® dealership’s parts department. Some installers replace the clips as a matter of course; however, they can be reused if undamaged.
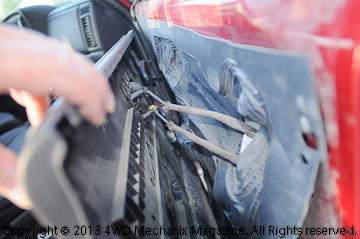

The panel rides in the window glass rubber seal’s channel. With all screws and clips loose, lift upward to free the panel from the rubber channel. The switch is now exposed, along with a lot of wiring for this circuit! This is why you disconnected the battery first.
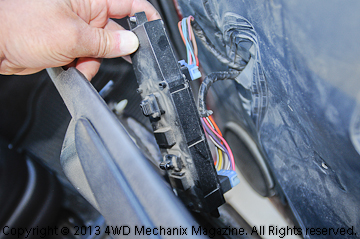
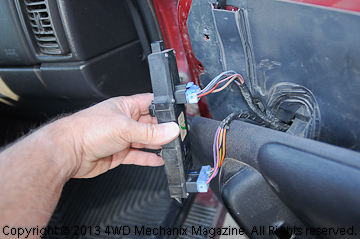
There are three screws holding this switch to the panel. (Count screw holes in your switch and identify the mounting points.) Once screws are removed, you can pull the switch carefully to a position that enables unplugging the harness clips. There are two in this application. These plugs have latch releases that are easy to identify.

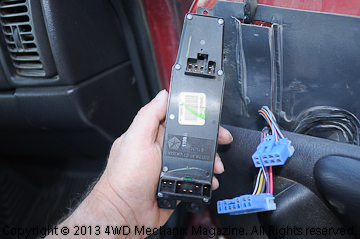
Press latch release and carefully rock the plug from the switch. Let the harness stay in its original shape when installing the new switch. You want wires to route the same way they did before. At right, the old switch is completely free, harness plugs are undamaged. Older plastic can be brittle. Always exercise caution when plugging and unplugging the wiring harness plugs. Do not bend the small contacts!

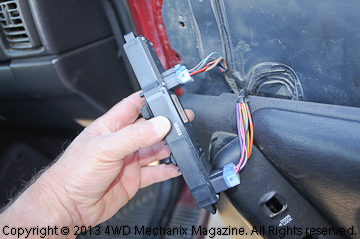
As a precaution, use a small dab of dielectric grease on each of the plug terminals. This will create a moisture and dust barrier. If you live at a humid climate, dielectric grease makes a huge difference in protecting electrical connections from corrosion and moisture wicking into the contacts.
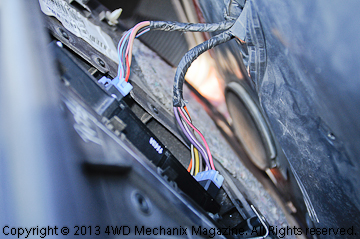
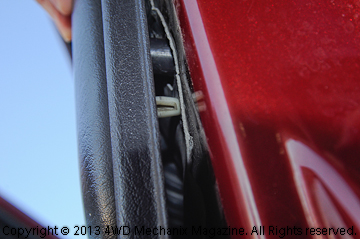
Switch is now installed, all three mounting screws securely tightened. The factory plastic sheath is in position as you align the locating sleeve pins and clips with the door skin slots. Your goal is to make all pieces fit as they originally did, with wires and the sealing sheath in proper alignment. The goal is to do this one time—correctly. Avoid the need to remove the panel again.


All hardware installed, with panel clips firmly snapped into their slots, the door looks right! The new switches should be fully operational, and the battery negative cable can be reattached. Always protect electrical circuits, make sure wiring is not pinched or laying against sharp edges! Door panel back in place, you want the electrics secure and safe.
