How-to: Dodge Ram Truck Air Filter and Fuel Filter Service
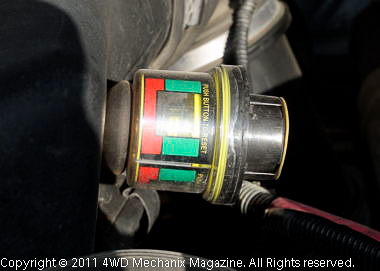
Dodge Ram’s factory gauge measures air flow at the air cleaner box. This indicates the air filter’s ability to move air. As the filter clogs, the gauge moves to the red zone.
Air and Fuel Filtration Needs
Air filtration is crucial to an engine’s performance and lifespan. A clogged air filter prevents adequate air flow and increases fuel consumption. If the filter does not seal properly, abrasive material seeps into the air stream and damages the pistons, rings and the valves.

Years ago, when truck engines were all carbureted (gasoline) or mechanically fuel injected (diesel), a clogged air cleaner was obvious: The engine failed to perform well or used excessive amounts of fuel. Today, with EFI/MPI on both gasoline and diesel engines, performance with a dirty air filter is not that easy to spot—until the filter clogs grossly!
“How often do I change my air or fuel filter?” many ask. This is a difficult question to answer, since both fuel and air flow are quickly affected by contaminants. For the Dodge-Ram truck that drives down washboard gravel roads all day long, an air filter can clog rapidly. A full day’s exposure to alkaline dust can render a pleated paper air filter useless. Dust conditions dictate filter needs.

Fuel filter service intervals are also difficult to determine. Of course, mileage-based OEM recommendations make sense. You will find these intervals listed in the owners manual or a Service Manual for your truck. There are additional variables to consider, too.
Diesel fuel, for example, can contain high levels of water and particulates. In some regions, diesel fuel and fuel filters suffer from bacterial contamination.
With both gasoline and diesel fuel filters, the pleated paper will swell when exposed to water. (That’s how the filter prevents water from damaging the fuel distribution system and fuel injectors.) As little as one bad tankful of water-dense fuel is enough to swell and clog the filter. Often, with little or no notice, the fuel supply shuts off!
Given the variables, it’s always wise to change air and fuel filters at recommended intervals—or sooner! In your Dodge-Ram truck owners manual, you will find “A” and “B” service schedules listed. These are the minimal time intervals for service.
If you tow or drive in dusty environments, use the severe-duty service schedule. Unless you drive your truck without a load and along dust-free interstates, the air filter requires steady attention. For fuel filters, always use the severe duty service interval.
How-to: Servicing a Dodge-Ram Truck’s Engine Air Filter
Modern Dodge and Ram truck engines use pleated paper air filter elements. These filters, contained in a plastic air box, are accessible and readily serviced.
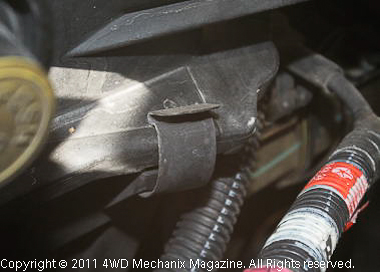
1. Commonly, the Dodge-Ram truck air boxes have a removable top with spring hold-down clips. This illustration shows a spring clip on the ’05 Dodge Ram 3500 turbo-diesel’s air cleaner box. There are usually several clips. Go around the box, loosening clips carefully.
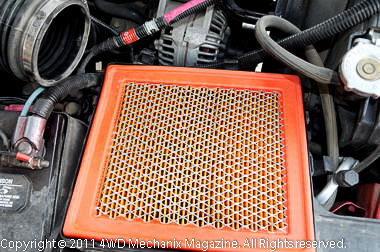
2. For this air box, it is easier to remove the top by first loosening the air inlet hose (upper left). This view is the topside of the old air cleaner, which looks clean. See the dirty air filter (further up the page). This is the same filter! Always remove and inspect the intake side of the filter.
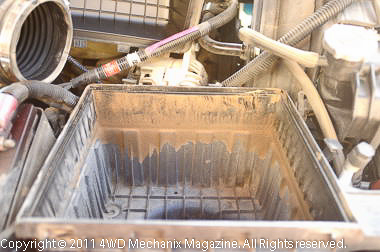
3. This is the unfiltered area of the air box. Fortunately, the filter element prevents the abrasive debris and road dirt from entering the engine! This illustrates how important it is to make sure the air filter element seals against the air box flange.
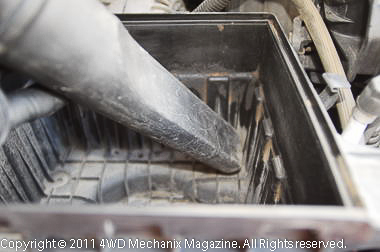
4. To prevent quick contamination of the new air filter element, clean out the air box during the filter service. A clean rag and solvent will remove the sooty debris. Dry out and vacuum the box before installing the new air filter.

5. Our choice for quality filtration and maximum engine protection is the Mopar® product line. For our ’05 Dodge Ram 3500 turbo-diesel, we turn to the Mopar® extreme service, OEM replacement filter.
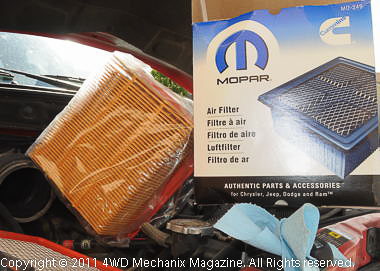
6. This is a unique option available for severe duty air filtration. Mopar® offers this as an OEM replacement air filter element. Many truck owners do not know about it…For the ’05 Dodge Ram Cummins turbo-diesel application, the Mopar® quick reference number is MO-249. (The full Mopar number is 53034249AA.)

7. The difference between the MO-249 filter and the standard OEM filter (top) is dramatic. Added thickness and dense pleats mean far more surface area. This allows the filter to accumulate more contaminants and provides a much longer service life. For long trips across dirt and gravel roads, a severe-duty filter makes the best sense.
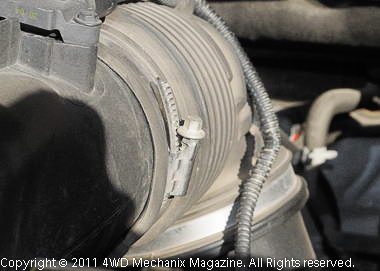
8. This is the inlet hose clamp. The hose is now in its original position on the air box lid. When loosening and tightening the clamp, be certain to restore the hose seal. Prevent dirt from entering the air stream at the engine side of the filter.
The Diesel Fuel Filter Change
Chrysler-built trucks with gasoline engines and EFI/MPI may not have a fuel filter. (See your truck’s owner manual or a factory OEM Service Manual.) Often, the high output fuel pump has a “sock” filter at its in-tank pickup. There may be a filter/regulator device that does not require periodic service. Such devices usually last the service life of the fuel pump or the pressure regulator.
Some models do use a replaceable filter. In the case of Cummins turbo-diesel engines, there is always a serviceable fuel filter. Diesel fuel, by its nature, requires ample filtration and even a water trap. This filter must be replaced at regular intervals. If not, the truck’s engine will lose power or stop running without warning.
housing before removing the filter. The fuel canister has a drain valve for removing excess water. You can also use this valve to drain the housing of fuel and contaminants before changing the filter cartridge or performing service on the canister, valve or water-in-fuel sensor.
Dispose of drained fuel properly.
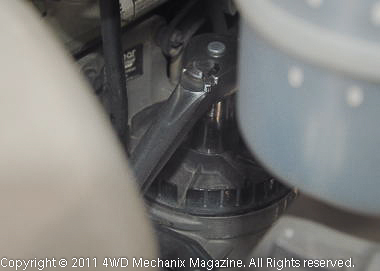
1. The ’05 Dodge Ram Cummins model has an accessible fuel filter canister. Wipe away any debris from the canister lid area before removing the cap! The plastic cap’s built-in hex fitting is 1-1/8″ size. Here, a socket and rachet turn the cap counter-clockwise to loosen it. This is plastic; use care not to damage or round off the hex.
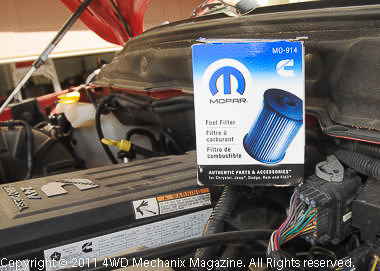
2. Want OEM dependability like your Dodge-Ram truck had when new? Use the Mopar® Cummins-rated fuel filters. Make no substitutes!
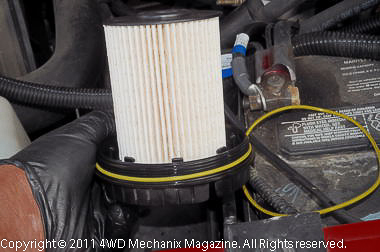
3. This filter is Cummins-rated for the turbo diesel. The package includes a new sealing gasket. Follow the provided instructions and carefully fit the filter into the cap clips. The lid clips are plastic and become brittle with age. Twist the filter sideways for removal, using minimal force to protect the tabs…Lube the O-ring as described in the new filter’s instructions.
Need to Prime the Fuel System After the Filter Change?
After changing the filter, you may discover that the “prime” is gone on the low-pressure pickup side of the system. (The engine will not start due to lack of fuel in the system.) This requires priming, and on Dodge Ram/Cummins systems like this 2005 Dodge Ram 3500, the system can be primed by the Chrysler recommended method below. Read these notes carefully and pay close attention to the procedures and safety requirements. If this procedure does not work, see the additional steps provided:
high-pressure side are serviced or replaced. Fuel system priming is accomplished using the electric fuel transfer (lift)
pump. Servicing or replacing fuel system components will not require fuel system priming.
operates for approximately 1 to 2 second and then shuts off. (Note: When ambient temperatures are cold enough to
cause the intake air heaters to operate, the fuel lift pump will operate during the entire intake air pre-heat cycle).
The pump will also operate for up to 25 seconds after the starter is quickly engaged, and then disengaged without
allowing the engine to start. The pump shuts off immediately if the key is on and the engine stops running.
transfer pump for approximately 25 seconds.
5 seconds. Repeat previous step until engine starts.
erratically and be noisy for a few minutes. This is a normal condition.
cranking intervals.
INJECTOR THROUGH THE HIGH-PRESSURE LINES. FUEL UNDER THIS AMOUNT OF PRESSURE CAN
PENETRATE THE SKIN AND CAUSE PERSONAL INJURY. WEAR SAFETY GOGGLES AND ADEQUATE PROTECTIVE
CLOTHING. DO NOT LOOSEN FUEL FITTINGS WHILE ENGINE IS RUNNING.
These steps and cautions are factory recommended for professional service technicians. If you follow them correctly, you can safely prime the fuel system on a later Dodge Ram Cummins truck equipped with an in-tank priming pump—like our 2005 Dodge Ram 3500.
Earlier Dodge Ram/Cummins Fuel System Won’t Pick Up Prime? Try the “Bump-Key” Approach!
Later trucks like our ’05 model have a priming pump at the fuel tank that responds to the factory priming procedure shared above. On earlier engines without the priming pump at the fuel tank, you can also lengthen the pump priming duration by “bumping” the key switch to the Start position.
On earlier Dodge/Cummins trucks, try lightly bumping the key to the Start position and quickly releasing the key to the On position—do this twice in a row without allowing the engine to fire. When the key releases to the On position, this should activate the pickup pump for a 25-second or so interval. Repeat this priming procedure as necessary, using the light “bump start” approach without actually allowing the engine to fire. Once you get the sequence down, you can quickly cycle the electric “pickup” fuel pump to prime the entire fuel system.
This comes in very handy if you do field injector emergency repairs. It also works when you completely run the engine and fuel tank out of fuel or clog up a fuel filter. After you change the filter cartridge, if the engine has lost prime, try this method. Use caution to preserve the starter motor and batteries.

